Sunday, September 30, 2012

Colorful Rice Chocolate Swissroll


Decided to use up my SMB (Swiss Meringue Buttercream) so I did a Swissroll to pair with it. Wanted to try the difference when paired with whipped cream and SMB. End result, definitely the buttercream is more yummy. And seeing the colorful rice, my gal was so happy. Effort not wasted. 
Browsed thru DeQueen and Tigg3r blogs and the chocolate Swiss roll pic on Tigg3r entice me to make 1 like hers.
Chocolate Swissroll (adapted from Tigg3r, I halve the recipe to make 1 mini roll)
35g Boiling Water
12.5g Coco Powder
10g Caster Sugar
2 yolks
7.5g Sugar
25g Olive oil
25g Cake flour

2 whites
25g sugar

1) Dissolve sugar and coco powder in boiling water and leave aside
2) Whisk yolks and sugar well. Add in oil and above mixture
3) Add in cake flour, mix well.
4) Beat whites til stiff peaks
5) Fold in 1/3 whites to cake batter, fold in cake batter to remaining whites
6) Bake at 200deg for 10-15min
7) Cool before spreading Buttercream (recipe, pls click here)


Snowskin Mooncake - Last Batch for 2012


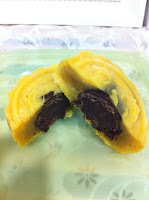
With the remaining paste in the fridge, I decided to finish them up and make them for 1 of my GF with some new ideas and inspirations from my friends in MFWL. Reference to previous post on the Snowskin recipe from DequeenKitchen, I made the above combination and had so much fun. Here is what I have done for each mooncake.
Flavours of Mooncakes:
White Kitty - Snowskin with White Lotus Strawberry Mochi


Kitty Head - Snowskin With White Lotus Paste


Yellow Kitty - Durian Snowskin with White Lotus Paste
*added 1tsp of durian essence to snowskin dough*

Beige Pooh Head - Red Tea Snowskin with White Lotus Paste
*replaced water with Pokka Red Tea*


Brown Doraemon - Chocolate Snowskin with Strawberry Truffle
*added 1tsp choc essence to snowskin dough, wrap strawberry paste with home-made baileys truffle*


Pink Pooh - Strawberry Snowskin with Strawberry Paste
*added 1tsp of strawberry essence*


Purple Kitty - Blueberry Snowskin with Strawberry Mochi Paste
*replaced water with Blueberry Juice, wrapped strawberry with strawberry paste*


Yellow Pooh - Durian Snowskin with Durian Truffle
*added 1tsp of durian essence to snowskin dough, wrap durian paste with home-made baileys truffles**


My encounter with Swiss Meringue Buttercream


After having the traditional buttercream cakes from Toastbox makes me want to make my own at home. I simply love the cake, the way it paired with the cream. Not too overwhelming and not that guilty conscious when you are having it, sharing with your kids. 
The only thing that is stopping me is the method to make it - Double boiling egg whites with sugar til sugar melts. Ermmm.... Seriously, I have no confident of not cooking my whites.. So, it has only been thoughts in my mind and remains that way for very long.
Finally, enough of just thinking, I decided to put my hands to it since I really really want and at the same time, I wanted to know if it really is stable enough to stay for 3-4 hours in rm temp for a friend's order that I will be using SMB to deco.
After referring to my previous bookmark, and remembering that someone in MFWL paired SMB with Hokkaido Chiffon, I decided to make Hokkaido chiffon for the cake base and use this recipe from TasteGoblet.

I also made 3 little chicks from the lemon butter batter to do a trial run for my girl's Playgroup Children Day giveaway..
Hokkaido Chiffon (refer to prev post)
Cake Batter - Lemon Butter 
2 yolks
35g Cake Flour
25g Oil
30g Milk

Cake Batter - Chocolate
2 yolks
30g Cake Flour
5g Coco Powder
25g Oil
30g Milk

4 Whites
60g Sugar

1) Whisk yolk lightly, add in wet ingredients and mix well
2) Add in flour and mix well
3) Fold in egg whites (dividing into 2 portion for above cake batter) gently and pour into tin
4) Bake at 180deg for 40-45min

Swiss Meringue Buttercream (adapted from TasteGoblet)
3 whites
1/2 Cup sugar 
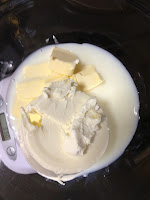
150g Butter
1tsp Vanilla Essence
Colourings (optional)

1) Double-boil egg whites and sugar til sugar melts
*continue whisking til you don't feel mixture is grainy, about 3-5mins)
2) Put on stand mixer and beat til stiff peak
3) Add in butter slowly, after each addition, make sure butter is incorporated onto mixture
*mixture will appear very soupy,after adding in butter. Don't worry, contd to beat)
4) Continue to beat til mixture is thick and glossy
*it will takes about 7-15mins to reach that stage*
5) You can add essence or colourings at this stage and beat in
6) Buttercream is ready and you can use it

Wednesday, September 26, 2012

Japanese Baked Cheesecake


Always loved Japanese Cheesecake but outside always selling them way too high for a small small portion. And it is very high in fats, so it's a No-No for ppl like me, dying to get rid of the excess kilos. Anyway I saw a member posting a pic of her baked cheesecake in FB and she said that she used the less fat version of creamcheese for this recipe and it turns out well. So, yes, why not? I decided to have a go at it.
During the trip for my weekly grocery shopping, I found out that there is another lower fat version of Creamcheese. I saw the 80% less fat and 60% less fat. Didnt know there is a version of this 80% less fat so I faster grab 1 to keep. After lying in the fridge for 1 week as I was busy baking my mooncakes, I finally found time to do it TODAY!
I took some pics to show the steps but it's very raw so please pardon the poor photo-taking skills. LOL!
Japanese Baked Cheesecake (adapted from Little Teochew)
140g Sugar (I reduced to 130g)
6 egg whites (I used 5 large eggs)
1/4 cream of tartar
6 egg yolks
50g butter
250g cream cheese (I used 80% less fat version)
100ml fresh milk
60g cake flour
20g cornflour
1/4 tsp salt
Method
1) Melt creamcheese, butter and milk on dbl boil **i use microwave on a 20seconds interval and stir them*

2) Beat egg whites til frothy. Add cream of tartar
3) Add sugar gradually and whipped til soft peak
4) Fold in flour, salt, egg yolk and mix well
5) Fold in egg whites gently
6) Pour into 8" cake tin, lined with baking paper on bottom and sides *i baked in a 6", 6 cuppies and a mini loaf tin*
7) Bake at 160deg, water bath *i baked with a tray of water with the cakes on the rack above it*

Tuesday, September 25, 2012

Piggy Mooncakes II


Attempted this little pigs for the last attempt, using the original mooncake recipe. Felt that the version of Maple Syrup makes the dough slightly drier and the chocolate version too. Perhaps the Coco powder could have been a reason too.
Today I made Chocolate Piggy and Original Piggy, both recipe from Christine's Recipes, just adding a teaspoon of chocolate essence as I do not want the coco powder to 'dry' out the dough.
Piggy Mooncakes (Reference to my post)
100g Plain Flour
60g Golden Syrup
1/2tsp Alkaline Water
28g Peanut Oil
Mix wet ingredients well
Make a well and add in flour, mix til mixture come together
Rest for 40mins
Mould into 15g balls. Use melon seeds as ears, choc rice as eyes
Bake at 160deg for 10mins, cooled and egg wash then baked another 10mins


Zi Char Style Noodle - Sheng Mian

Made my last batch of orders for Baked Mooncakes and decided to cook a lazy and simple dinner. Since it has been a while seen i cooked Yi Mian, I decided to try Sheng Mian since it is the same type of ingredients used. This time round, I took pictures of the way to cook and ingredients used. I hope everyone will be able to cook this fuss-free meal.
Actually there is no right or wrong ingredients. You can use any leftover ingredients you have from home. I had some fish slices from cooking fish porridge this afternoon, fishballs from yesterday noodles soup etc. So I cut some pork, prawns, caixin and the leftover fish slices and fishballs for my gravy.


type of seasoning used
noodles used


1)Stir fry garlic til fragrant
2) Add in ingredients and cook til 80% cooked

(step 2)


3) Prepare seasoning in a bowl and pour into wok (3Tbsp Oyster Sauce + 2 Tbsp Dark Soy Sauce + Pepper + 1/2 Tbsp Fish Gravy)
Seasoning (step 3)
4) Add 500ml ml of water. Taste when it comes to boil
5) Add in vegetable and stir well
(step 5)
6) Add beaten egg, mix well. Stir in corn starch when gravy starts to boil
7) Put noodles on plate and dish gravy on top


Friday, September 21, 2012

Dual Flavour Ice Cream Cake II


Happy that my dear friends are coming over for a small gathering and catch-up session on a saturday, I decided to make a dessert for them. Ponder on what should I make, finally decided to try again - Ice Cream Cake.
This time i decided to try dual flavour. From the many good feedbacks the last round for my Oreo Ice Cream Cake, I decided to make a Oreo and Strawberry Chocolate Ice Cream Cake. Intially wanted to make a Strawberry Ice Cream with Oreo Ice Cream but seems like it is not the season now. All the strawberries selling in supermarket seems very 'ripe' and not suitable so i used Cadbury Strawberry Yogurt Chocolate this round.
Still maintain the same recipe from the other round and prepared the ice cream few days ahead. Only make the sponge the night before, this time with Optima Sponge Mix to see what difference it makes to the cake layer after freezing it with ice cream.
This time round, i also did a step by step photos for sponge and assembly of cake. Perhaps will include the steps of preparing the ice cream the next round. Stay tune friends. You can also leave me comments should you need any guide or step by step photos. Will do my best.
Ice Cream Recipe (reference to Oreo Ice Cream Cake)
200ml Whipping Cream
100ml Milk *
55g Chocolate **
I cooked Whipping Cream and Milk til almost boil
Add in chocolate and stir til all melted
Leave to cool before freezing
*I used fresh milk for Oreo flavour, strawberry milk for Strawberry Chocolate flavour
**I used white chocolate for Oreo flavour, strawberry yogurt chocolate for Strawberry Chocolate flavour
***I added oreo crumbs after freezing for 1hours, stir in oreo crumbs. Amount up to individual preference
Sponge Cake Recipe (reference to Pandan Kaya Cake)
250g Sponge Mix
4 eggs
1Tsp Vanilla Essence
11/2 Tbsp Olive Oil
3Tbsp Milk


1)Beat sponge mix and eggs til light and fluffly
2) Mix vanilla essence, olive oil and milk. Fold in gently to cake batter
3) Pour into prepared tin and bake at 170deg for 40-45mins
4) Cool cake and cut into layers
Method of Assembly

1) Put a cling film over the cake tin. Put 1 layer of sponge over and push down bottom of tin gently
2) Spread semi-melted ice cream on to sponge and level it
3) Put another layer of sponge over
4) Spread another layer of semi-melted ice cream on sponge and level again

5) Top with another sponge, cover with cling film and freeze


6) You can whipped cream til stiff and bring out 'freezed' ice cream cake to cream
7) Deco as per you wish, and freeze it again