Thursday, February 28, 2013

'Magic Bread' by Alex Goh (modified slightly)


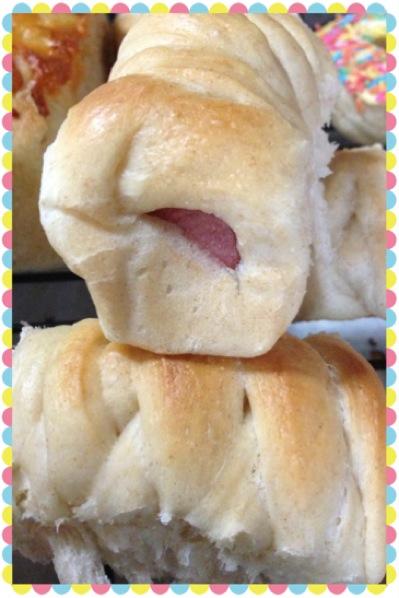
Chanced upon this entry from someone's blog and was really enticed by the looks of the bakes. Somehow it reminded myself that I haven been baking bread lately, not that frequent and always buying those store-bought.. Hubby kinda missed my bread, that was what he said the other day and my gal, always asking to buy the Colourful sprinkles donut after her class every afternoon for snack. Seeing how much she likes it, I decided to take this recipe, modify slightly to make it Wholemeal and also into a few variations. Hotdogs rolls, mini cheese sugar buns, plain loaf, donut-shaped bread with sprinkles.


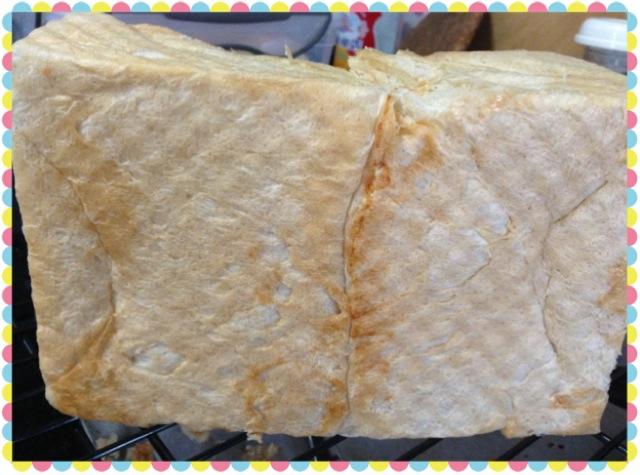
Only thing I don't like is the preparation of 'Tang Zhong' day before so it means I must bake the nxt day or at least within the next 3 days. But the results of the bakes, it's soft and yummy!! My gal was so happy with her donut-shaped bread! So I am a HAPPY mummy too!! Hubby also feedback that this variation is nicer than the usual direct method of making Wholemeal so that makes me a HAPPY wife too!! (Dun mind the ugly outcome of the bread cos it's my first time using the mini loaf pan and the lid got a bit stuck, think cos of the milk wash, will do better nxt attempt)

Magic Bread by Alex Goh (adapted from Chunky cook)
(Prepare 12hours before)
100g Bread Flour
70g Boiling water

1) Boil water and pour onto flour
2) Stir until become into dough
3) Cool n store in fridge

**my modifications**
320g Bread Flour
60g Wholemeal Flour
20g Plain Flour
6g Yeast
6g Salt
80g Sugar

185g Water
50g Egg

60g Butter

1) Mix all the above dry ingredients
2) Add in the water & egg into dough-like
3) Add in the dough prepared night before
4) Add in butter and knead into elastic dough
5) Leave to proof for 40-60mins
6) Cut n shape accordingly
7) Leave 30-40mins for 2nd proof
8) Bake for 30mins or til golden brown, brush with milk b4 baking them

***
I use 20g for my cheese sugar buns 
I use 300g dough for the loaf
I use 30g for the hotdog rolls


Friday, February 22, 2013

Colourful Hokkaido Chiffon with Strawberry Cream


Did a simple and fast recipe for this Sunday gathering with my #1 gal's frens at Mac's. Since I won't be able to do it on Saturday as I will be at my relative's place thus, I decided on Hokkaido Chiffon as it can be fridges and make in advance.
I am using the same recipe as I used previously for my Oreo Hokkaido Chiffon Cupcakes but I replaced the crushed Oreos to 1tsp vanilla extract. And I will be writing down the recipe I am using for the cream for my own documentation as well.. Haha~ 
I didn't used whipping cream with custard as I wanna use up my Frosty Whip. So I added strawberry milk to it and whipped to stiff peak. So if you want to know the proportion, here you go:

Strawberry Cream
150g Frosty Whip
140ml Strawberry Milk

Whip both ingredient to stiff peak and pipe into the chiffon cupcakes

Light & Moist Banana Chiffon


Wanna bake something for Lunar Month 14th day's prayer, so decided to search and blog. Seeing the bananas tt are so riped, I decided to make something tt can use up the bananas too. After browsing thru some blogs, I decided to bake this - Light & Moist Banana Cake by Hearty Bakes.
I halve the recipe and baked into 2x4" cake as it's my first time using this recipe, I didn't dare to bake a whole recipe. Keeping my fingers crossed, it will turn out well.. 
On the other hand, I used back a recipe tt I posted previously - Oreo Hokkaido Chiffon and replaced crushed Oreo with vanilla extract for Sunday's gathering. If you are keen, this is the recipe.


Light & Moist Banana Chiffon (adapted from Hearty Bakes)
6 Yolks
40g Sugar
60ml Corn Oil
200g Banana Puree (mashed)
120g Cake Flour

7 Whites (I use 6 whites)
40g Sugar


1. Preheat oven to 175°C
2. Prepare paper cups
3. In a bowl, manually whisk yolks with sugar till pale in colour
4. Add Oil and whisk till combined
5. Add in banana puree
6. Sieve in cake flour and mixed till well-combined
7. In another mixing bowl, whisk whites will frothy
8. Add sugar slowly to whites and whisk till medium peak
9. Take 1/3 whites lightly fold into the yolks mixture
10. Pour the yolks mixture to the balance of whites and fold gently. DO NOT deflate the whites.
11. Pour batter into paper cups
12. Top with a walnut on top of batter
13. Baking tie about 20-25mins subject to size of paper cups.

Thursday, February 21, 2013

French Macaroons


Saw someone posted in FB with nicely baked macaroons, it makes me so tempted to make them especially after tasting very nice macaroons from Laduree from Paris. It is not too sweet like some of them selling in SG and its so fragrant & hint of almond taste too. Some of my mummy frens in my #1's Playgroup also likes macaroons. So since this Sunday we are having a gathering and my silicon macaroon mat from Taobao is here so I gonna make it into good use. Cartoon shaped macaroons as toppers for the cupcakes will be so nice and so simple. I believed the kids will be thrilled. Yeah!
So here I go, making them again..
Anyway, feed backs from the silicon mat, no good! It sticks, as compared to those I used the parchment paper. So nxt round, I will draw and use parchment paper to pipe.. =( Sad tt I won't be able to have those cartoon macaroons for the kids..
The overall taste is yummy, great for chocolate lovers, coupled with Nutella, real yummy and nt too sweet. Will attempt this again.. =)


Macaroons (adapted from Hearty Bakes)
140g  finely ground almond
250g  icing sugar
25g  cocoa powder
100g egg white (room temperature)

1. Blend ground almond, cocoa powder and icing sugar in a food processor till fine. Give it a few pulse. (I skip and used the ground almond straight)
2. Whisk egg white until foamy and slowly increase speed to high to whip until firm. It should look glossy at this stage. Try lifting up the whisk, the whites should form a peak that droops just a little. Use a rubber spatula, fold in the dry ingredients gently into the whites in three or four additions.  When all the dry ingredients are incorporated with the whites, the mixture will look very much like cake batter, if you lift with your finger, it should form a gentle, quickly falling peak.
3. Transfer mixture into a piping bag fitted with a plain nozzle. Pipe into small rounds about 1" in diameter onto parchment paper, leaving about an inch between each round. Rest macaroons for about 20 mins.
4. Bake at 180C for about 10 to 12 minutes.
5. Remove macaroons from the parchment and place them on a cooling rack.
6. I sandwich them with nutella

Kueh Bolu - III


Another attempt on Kueh Bolu again, much raved by a fellow baking lover, Cindy thus I am so tempted to bake them. It originates from a baking lover, Soh Pin Tee from BW and Cindy added vanilla extract to make it more fragrant.
I tried the recipe as I forgot to buy bread for the kids, so it will comes in handy for them as breakfast. I did 3 versions - Plain, Chocolate Rice & Pandan. All taste equally yummy and fragrant. You should try them if you have time!

Kueh Bolu (adapted from Soh Pin Tee, modified by Cindy)
30g Plain Flour (I use Cake flour)
1 egg
25g sugar
1/4Tbsp Veg oil
1/4tsp Vanilla Extract
Some melted butter to grease the pan

1) Preheat oven at 200deg, put greased pan to heat them
2) Beat sugar & eggs til it increased in volume
3) Fold in flour, add oil & extract
4) Put batter into greased and 'preheated' pan
5) Bake for 10-12mins or til golden brown

Friday, February 15, 2013

Cream Cheese Pound Cake


Saw NTUC selling blueberries at 2 for $4.95 if I remember correctly, so decided to use them for baking.. Berries is very good for us so it's good to indulge in them occasionally... Decided to use them with this recipe from Little Teochew as I saw a fellow baker post a pic of them and I fell in love and registered it in my To-Do list! 
First, the recipe asked for 150g Butter and my Elle Vire butter is 200g per block so I dun wan to have leftover, I ended using 1 and 1/3 of the recipe. And in my calculation, I accidentally added 35g more of cream cheese so I added additional 20g of flour, using a combi of plain and cake flour. =) Blur sotong rite!?
The end results, I made plain and blueberries flavour, it yummy. For someone who don't really enjoy all the pastries but only baking pleasure, I fell in love with it. It is light, moist and with a tinge of sour from the blueberries, cake is not overpowering with the butter nor cream cheese. 1 word - NICE!


Cream Cheese Pound Cake (adapted from Little Teochew) 
*i made a 4", mini heart shape, 4 mini loaf & 12 mini cuppies*
260g all purpose flour(160g plain + 100g cake)
1/2 tsp baking powder
1/4 tsp baking soda
1/4 tsp salt
200g unsalted butter, room temperature
226g package cream cheese, room temperature
220g castor sugar
4 large eggs, room temperature
1/2 tsp pure vanilla extract
Zest of a lemon or orange (I omit tis)

1) Cream butter and cream cheese til light n fluffy. Add sugar in 3 addition
2) Combine flour, baking powder, baking soda & salt. 
3) Add eggs 1 at a time, mix well. Add Vanilla essence
4) Mix in flour and pour into prepared tin
5) Bake at 170deg for 50mins

*cuppies is 20min, mini loaf is 30mins and the rest is 40-50mins*

Thursday, February 14, 2013

Happy Valentine Day to all!!


Happen to chance upon this entry from Ancoojournal and it looks yummy and interesting to me. So since its CNY and we have Bak Kwa at home so why not try. And as V-day is approaching, I decided to make it in lil hearts to 'celebrate' V-Day!!
Personal opinion, I feel that it is not buttery enough, but it's not very sweet and it goes well with the chew Bak kwa. Eh, should I add a little more sugar the next round and try with another brand of butter? Erm... I am not too sure cos I am nt a fan of Bak kwa definetely and I am just baking them for the fun and also to have some lil hearts for V-Day. 
On the other hand, hubby likes it, as well as grandma. They says it was addictive and can't stop. They liked it as it wasn't too sweet and it goes well with the saltish & sweet Bak kwa. So, different people have different views about it. So, try it. For me, I don't have enough of my pineapple tarts yet and forcing hubby to deviate from his usual route to get me 1 more box tml! Yeah!!

Bak Kwa Cookies (adapt from Anncoojournal)
125g Butter, soften
35g Icing sugar
40g small Egg
1/2 Vanilla extract
200g Plain flour
65g Bak Kwa, mini diced


1) Cream butter and sugar till light and fluffy
2) Add the egg and beat till well incorporate. Add Vanilla and mix
3) Add the flour and bak kwa, and mix thoroughly.
4) Put the dough in a plastic bag, roll it out evenly. Refrigerate it for at least 30 minutes until firm
5) shape it accordingly
6) Bake at 180C for 16-18 minutes, or until it turned slightly brown.

Wednesday, February 13, 2013

Irisa is 4


With just a 2 days allowance, I had to managed my CNYorders and come up with a 3D Princess Cake + 14 cupcakes for Irisa school birthday celebration. It's a feat to me and I am glad that I managed to come up with a good and satisfying end product! It brought a huge smile on her face and that is priceless! 
I used DeQueen's Moist Choc Cupcakes this time and used MrsNgSK buttercake for the Pincess base. The cupcakes was yummy, as well as the base. And this round I used MMF to cover the base of Princess Cake as well as the decorations. I really admire those people working with fondant all the time, it really was not easy.. So a simple princess and there she goes.


Moist Chocolate Cupcake (adapted from DeQueen)
  • 63g softened butter
  • 70g sugar (original recipe was 80g)
  • 80g plain flour
  • 13g cocoa powder
  • 1/4 of 1/4 teaspoon coffee paste
  • 1/4 teaspoon baking powder
  • 1/4 teaspoon baking soda
  • 1 egg
  • 60g milk
  • 6 pieces of choco mint chocolate(i am using Andes.),broken into 1/2
The Preparation:
  1. Sift flour,cocoa powder,baking powder and soda.
  2. Cream butter and sugar till light and fluffy.
  3. Add egg and mix well.
  4. Add coffee paste and milk,mix well.
  5. Stir in (1.) with a spatula,mix well.
  6. Fill up 1/4 of the liners,drop the chocolate in,fill the liners with more batter to 3/4 full.

Another trial - Pineapple Tarts


Finally had time to update my blog, it was a busy busy time for me. First was my advance birthday treat - Phuket, then my gal's 4th Birthday which I promised to have a 3D Princess Cake and then all my CNY goodies orders. 
Managed to rushed out and did another trial for the tarts. Both recipes rave good reviews but I find this recipe slightly less sweet, plus hubby prefer this so I guess I will have to use this for coming years!!
This recipe is also a bit melt in the mouth, less sweet and a bit less buttery as compared to Table for 2's recipe. Maybe that's why hubby prefer this?? My opinion, both taste equally good!


Pineapple Tarts (adapted from LittleTeochew)
- 400g plain flour*
- 50g corn flour
- 1/4 (heaped) tsp salt
- 280g cold, unsalted butter (do not allow it to soften)
- 3 egg yolks, beaten
- 3 tbsp cold water (or iced water)
- 6 tbsp icing sugar**
- 1/2 tsp cognac or pure vanilla extract
- For glaze, mix 1 egg yolk + 1 tbsp water

1) Using rub-in method, rub butter with flour, sugar & salt
2) Add in beaten yolk, vanilla & cold water then jus scrap and mix til come together
3) Referigerate for 10mins and use 
4) I wrap 10g dough + 5g paste, bake at 180deg for 20mins, wash with beaten yolks+milk