Showing posts with label Thermomix. Show all posts

Wednesday, September 18, 2024

Pistachio Scones


I think by now, most would have guessed how much of a pistachio lover myself is. 😂 Sorry I made a bottle of pistachio butter and I love it so much. I just had to try all the recipes that I have kiv in my notes to see if they are edible and worth the carbs (altho i tweak them to a low carb version) 


Using my thermomix, 1mins is all it takes to knead them to come together. And the inbuilt scale, I can just weigh them all in and then get the dough done! 


I spread a layer of my homemade pistachio butter for extra flavour! Oh my, I love the combination! It helps to makes the scones not so dry as this recipe doesnt uses any butter. And it is slightly more crunchy than crumbly as most scones are. I love the bitterness of tbe cocoa nibs as well. Nice combi with pistachio. 


Guess what!! Each scones is less than 100kcal! Hard to imagine right!! Off to school they are! ❤️


Pistachio Scones
120g Almond flour
40g Wholegrain flour
20g Replacement sugar
50g Oat milk
1g Baking powder
20g Cocoa nibs
20g Pistachio, chopped


1) Put all ingredient in thermomix and knead for 1min
2) Put dough and form a square disc, fold into halves and repeat 3 more times
3) Roll out and spread pistachio butter
4) Foll into halve and cut into 8 triangles
5) Bake 180deg x 15mins

Sunday, August 25, 2024

Peanut Butter Jam Muffin


Saw this interesting recipe way earlier and decided to try them today! I love peanut butter and jam and was curious to know how would they taste! And also, seeing that it used peanut butter as part of the recipe, I am really really so intrigued to know! 


I am using this peanut butter spread, love how creamy and smooth this is. Always yummy with my overnight oats and bread slices! Just the right taste I want when I am craving peanut butter. The strawberry preserve I am using was gifted by my lovely collit who got her hub to bring back from Germany! So sweet of her! I love it so much as it is natural sweetness with a slight tangy, not like our store-bought ones so sweet! 

While baking them, smells so so good! The peanut butter smell makes me so hungry! They rises nicely and some had the jam exposed on the top. 


This is how soft it is! Hub had 2 at a go and the kids love it so much. Hub says sweetness is just nice and asked for more jam next round. This is gonna be another frequent bakes for us!  

Peanut Butter Jelly Muffins
Recipe from Cookidoo, makes 12)
70g unsalted butter
200g Peanut butter (smooth)
85g Light brown sugar (Used 70g)
1 Egg
115g Yogurt (Accidentally added 130g)
130g Milk (Reduce to 110g as over add yogurt)
1tsp Vanilla
1tsp Baking powder
1/2tsp Baking soda
170g Plain flour
Pinch of salt
150g Strawberry Jam (I didnt weigh, just put small teapoon in the middle batter)

1) Add butter, peanut butter and sugar - 15sec speed 4
2) Add the remaining ingredient, except strawberry jam - 10sec speed 4
3) Scrap down and mix again - 5sec speed 4
4) Fill cupcake case to half and make a hole in middle of batter and put teaspoon of jam
5) Cover top with more batter
6) Bake 180deg x 22mins

Wednesday, August 14, 2024

Blueberry Coffee Cake


Today baked a Blueberry Coffee Cake for school snack. Been wanting to try this recipe and finally gotten some korean frozen blueberries that was on promo last weekend, just nice to use them for this! 


This recipe uses plain flour, but with the addition of yogurt, the whole cake is so soft. And no, it does not use any coffee, and my guess for the name is due to the cake is eaten during tea/coffee time? 

The topping is slightly sweet, which I think I will use only brown sugar for the next round and probably 2x of the flour so that there is more crumbly crumbs on top! I love struseel tops!!

The cake base itself is soft n moist. The tangy from the blueberries even out the whole cake. Totally love it! ❤️ Do give it a try. 


Blueberry Coffee Cake
(Recipe from Cookidoo, slight modifications)
Toppings: 
2Tbsp butter
2.5oz sugar
2oz brown sugar
1oz plain flour
1tsp ground cinnamon
1/4tsp salt
1pinch ground nutmeg
1oz chopped pecans (i use walnut n almond)

Cake batter:
6oz yogurt
2oz olive oil
1tsp vanilla paste
2 eggs
8oz plain flour (keep 0.5z to toss blueberries)
1tsp baking powder
1/2tsp baking soda
1/2tsp salt
1pinch ground nutmeg
10oz blueberries (to be coated with 0.5z plain flour)

1) Add all toppings ingredients except nuts - 10s speed4
2) Repeat again
3) Add nuts - 2sec speed4 (i chop buts seperately from the strussel and repeat til i prefer the chopped sized)
Keep aside
4) Put all cake batter ingredients except blueberries - 15sec speed 4
5) Pour batter to greased tin, top with blueberries and then with strussel and lastly nuts
6) Bake at 180deg for 55mins


Sunday, August 4, 2024

Fast & Easy Fried Noodles


Its the weekend! End of the week already and a new week is starting. Time really flies and its so scary, hahahha. 

Today decided to change my menu as it was raining the whole day since late morning. The weather is so cold and comfy that I even took a short nap before cooking dinner.

I have bookmarked this recipe for a while and since the cold weather has made me kinda lazy, what better day to cook this then. So here we go, and I was also craving some noodles (from watching too much Jinny Kitchen) 


I am using this noodles, as such I tweak the recipe a bit. If you are using those thicker kind of dry noodles then can consider to follow the cookidoo exactly. 

I love the seasoning of this noodles, it is jus nicely flavoured and not overly salty. With the non-fried noodles, I am quite comfortable to cook them once a while for the family as an indulgence ❤️

Fast & Easy Fried Noodles
(Recipe from Cookidoo, slight modifications)
30g Light soy sauce
30g Oyster sauce
10g Dark soy sauce
Pepper
1 whole Garlic
30g Olive oil (I used 20g olive and 10g sesame oil)
1 pkt Baby Kailan
300g Shrimps
150g Minced pork
5 portion Koka non-fried noodles

1) Set kettle to cook with 1L of water - Kettle mode
2) Put noodles in and cook for 3mins, stirring halfway. Drain and set aside - 3mins 100deg reverse spoon
3) Add garlic to mixing bowl - 5 sec, speed 5
4) Add cooking oil - 3mins 120deg spoon speed 
5) Add vegetables, minced pork & shrimps - 4mins, varoma, spoon speed
6) Add in cooked noodles and toss slightly - 2mins, varoma, spoon speed


Wednesday, July 24, 2024

Foccacia


Today decided to make foccacia for the youngest for recess, add on some fruits and nuggets will be an enjoyable meal for him. 


This is my first time baking these after so long. With some advise from my dear advisor fren, she taught me to cold retard them before baking, best overnight but I dont have enough time to cool them in the morning so i left it til evening to bake them. 

Didnt know how to poke the holes and just randomly deco with some onions and cherry tomatoes. Sprinkle some rosemary herbs and I FORGOT TO SPRINKLE SALT! 


The end result seems ok, acceptable to me. Exterior is crusty, inside is chewy. Just that probably it would be nicer with the sprinkling of salt as it is slightly. Probably when we serve it with the mains and dips, it would balance out the taste. 

Go try it! Youngest accepted the taste means APPROVED!
 
Foccacia
Recipe from Cookidoo
20g Olive Oil
400g Lukewarm water, i use room temp
1.5tsp Yeast
500g Bread Flour
2tsp salt

Toppings:
Tomatoes, Onion, herbs & drizzle of Olive oil

1) Mix oil, yeast, water - 5sec speed 3
2) Add flour and salt - 20sec speed 6 then knead 2mins
3) Place dough onto greased baking tin and let it proof 1hour
4) Lightly oil fingers n spread dough out to fit the baking tin and let it proof another 30mins (I let it proof in fridge til I am ready to bake n bring to rm temp for 30-45mins)
5) Deco with the toppings and drizzle the olive oil
6) Bake 35mins at 200deg

Monday, July 22, 2024

Chicken Floss


Today decided to make some floss with chicken breast that I have. Would be a good snack for school when make into a sandwich. 

I love homemade floss as you can control the ingredients and you know whats in it. But of cos the flaw is that it doesnt keep as long as store bought as no chemicals or preservatives are used when you make it at home. 


The kids enjoyed having it as an extra topping for their meals! ❤️

Chicken Floss 
Recipe by Cookidoo
2 Chicken Breast (i replaced with chicken)
10g Sesame oil
40g low sodium light soy sauce
40g sugar
20g Shaoxing wine
150g water

1) Add chicken, cut into strips, sesame oil and light soy sauce - 5mins 100deg rv spoon
2) Add remaining ingredients - 30mins varoma rv spoon
3) Shred 5sec speed4
4) Continue cook 40mins varoma speed 1
5) Lightly bake 150deg x 10mins, halfway stirring them to further dry them up

Wednesday, July 17, 2024

Pandan Chiffon


Baked Pandan chiffon early this morning as wanted to multi-task since I be going for facial during lunch time later. Wanted to eat lunch after back from work while working. 


Nicely browned, and love the smell when you bake with natural pandan extract. It smells so much fragrant when its baked with pandan leaves.

I think I didnt do a good job of folding them in this morning but thankfully it turns out well still. Not super fliffy but still moist and fragrant. Only thing is I think I would cut back a bit of sugar nxt round. 


Blending and using my strainer to get the juice out. And i mix it with coconut cream and fresh milk for a healthier version of it. Homebaked is always the best as you can adjust and modify the recipe to your own tastebuds and preference. 


All packed in boxes to bring to office to share with collits tomorrow. And leaving 1 at home for my family to snack, as well as packing them for lunchboxes tomorrow too. Took 1 container less and was saying that I didnt expect to have so much. Hub says ask me to leave the balance for him as he could finish them for me 😂 Must have smell so good. Go try it!

Pandan Chiffon Cake
Recipe from Cookidoo
Pandan Juice
100g Pandan leaves
250g Coconut water (i mixed 65ml coconut cream and top up balance with fresh milk)

Cake
220g Sugar
7 Eggs, seperate yolk & white
200g Grapeseed oil
1tsp Vanilla paste
280g Self-raising flour
20g Cornflour
Pinch salt

1) Blend pandan leaves - 5sec speed 9
2) Add coconut water - 1min speed 8
3) Pour out and strain out the juice, set aside
4) Clean bowl & insert butterfly whisk, add yolks and 150g sugar - 5min speed 3.5
5) Add oil, vanilla, pandan juice - 5sec speed 3
6) Add 150g flour and cornflour - 6sec rv speed 2
7) Add remaining flour - 10sec speed 2
8) In a clean bowl, insert butterfly whisk. Weigh 70g sugar
9) Add egg whites - 4min 37deg speed 3
10) Continue while adding sugar bit by bit - 3min 37deg speed 3
11) Slowly work in batches and add whipped whites to batter
12) Bake 40-45mins at 180deg

Tuesday, July 16, 2024

Banana Muffins


Today decided to bake this Banana Muffins for school snackbox. Have bookmarked a while as am curious how it would taste baking with wheat flour. Sounds healthier to me in a way. 😂

The aroma of the cinnamon and nutmeg, even before sending to the oven smells so good. Already very excited to see the end products.


Waited patiently for it to cool down and Hub happen to have 1 for his tea break, just in time. I love such soft n fluffy bakes when all it took is less than 5mins to prep and send to oven. Can you see how soft it is? 


This is the flour I used. It says Super fine wheat flour. Shall explore more recipe using this flour and see what difference it makes. 

My firstborn came home and had 1 too. She is surprised how can muffins be so soft. Try it. 

Banana Muffins
Recipe from Cookidoo
1.5oz Butter
4.5oz Wheat flour
1.5oz Sugar
1.5tsp Baking powder
Pinch of salt
1 Egg
2oz Milk
5oz Banana (approx 2 banana)
1/4tsp Cinnamon powder
1/4tsp Nutmeg powder
Rolled oats & almonds bits for toppings

1) Add all dry ingredients and butter - Turbo 1sec x 4 times
2) Add in balance ingredients - Mix 6sec speed 5
3) Fill liners 2/3 full, sprinkle with toppings
4) Bake at 180deg for 25mins


Thursday, July 11, 2024

Traditional Sponge Cake


Today was impromptu bake as was planning for a trip to JB. End up plan was postpone, as such decided to bake and prep something for youngest classroom snack.

Saw this recipe a while back and bookmarked it. Instead of baking full recipe for a 6inch cake, I made them into small cupcake sizes and topped with his favourite oreo bits. 


The inside was soft and fluffy. But had a small small amount of flour bits as I was lazy to sift the flour. The sweetness was just nice and good to maintain as it is. Probably the next round I will be hardworking and sift my flour 😂 Definitely a keeper!

Traditional Sponge Cake
Recipe from Cookidoo, halve recipe
2 Eggs
55g Sugar
55g Cake flour
15g Milk
15g Oil
1tsp Vanilla paste
1) Add eggs and sugar - Insert butterfly whisk, 10mins, 50deg, Speed 3.5
2) Add in sifted flour - 20sec speed 2, reverse blade once the flour is added in
3) Add in milk + oil mixture - 15sec speed 2
4) Fill cupcake cases 3/4 full and add toppings (optional)
5) Bake 170deg x 15mins
Wednesday, July 10, 2024

White Chocolate Chips Chewy Cookies - 2 styles


Today do not need to bake classroom snack as not sending youngest to school. So decided try making some matcha white chocolate cookies for firstborn. Have bookmarked this cookidoo recipe and planning to modify by adding some matcha powder to them. 

Thinking of trying with half the dough as youngest wont be able to try if I baked a full batch of matcha flavours.


This is how thin n crispy the cookies are. It is slight chewy with a bit of crunch. Overall i would says its quite fragrant and sweetness can be slightly reduced a bit more. The white chocolate chips added some sweetness to the taste of the cookies as well!


Added about 1.5tsp of matcha powder to the remaining dough after i scoop out half on the baking tray. Using the thermomix to mix the powder in for me in 20seconds. Very well mixed! This is how it looks like cross section. I would say the matcha flavour is not overly strong yet with a light matcha fragrant. And as I mentioned earlier, I would further reduced the sugar for this recipe. 

I actually reduced the white sugar and wanted to do the same for the brown as well. Accidentally poured in the amount called for 😂 This recipe is fast, just put all ingredients together, except for the chocolate chips, a quick 30sec and dough is ready. Another 20sec to mix in the chocolate chips! Nothing more to complain about!! 

White Chocolate Chips Chewy Cookies
Recipe from Cookidoo
120g Butter
100g Sugar (reduced to 80g)
80g Brown sugar (can be reduced to 60g)
1 egg
250g Plain flour
1tsp vanilla paste
1tsp baking soda
pinch of salt
100g white chocolate chips
1.5Tbsp Matcha powder (optional)

1) Put all ingredients in, except chocolate chips and matcha powder - 30sec speed 5
2) Add in chocolate chips or toppings of your choice - 20sec speed 3
3) Take out half batter, and add matcha powder to remaining dough in mixing bowl - 20sec Speed 3
4) Bake them with spacing as they will spread, 170deg x 15mins
5) Cool in tray for 10mins before removing them to cool further


Monday, July 8, 2024

Matcha Granola Muffins


Today i venture and decided to make this for my firstborn. Have seen this recipe previously and very intrigued to try out as it seems to be a low calories bake, without the use of flour. It uses banana to bind the ingredients together and i was keeping fingers crossed when i see it rises slightly while baking them.


I topped some with balanced banana slices, and some i experiment with white chocolate chips, leaving some original without toppings. 

The inside is slightly moist with a bit of crunch from the granola. Its a very interesting texture. The faint flavour of the matcha, not too overwhelming too! I love it.

Luckily firstborn love it too and says gonna have it for breakfast already! Me personally enjoyed it and luckily it passed hub’s fussy tastebud too as he always ‘failed’ my healthy bakes 😂

Do try it, its a very straightforward recipe. Just dumped all in and blend then throw in the oven already!

Matcha Granola Muffin
Recipe from cookidoo, with slight adjustment
9oz granola (i used matcha granola)
2 large eggs
8oz banana
2tbsp matcha powder
3oz brown sugar (i think can reduce 2.5oz)
3oz coconut oil
1tsp vanilla
1/2tsp salt
11/2tsp baking powder

1) Put all ingredients in - 20sec speed 6.5
2) Pour batter into cupcake cases and bake 20mins x 180deg


Thursday, July 4, 2024

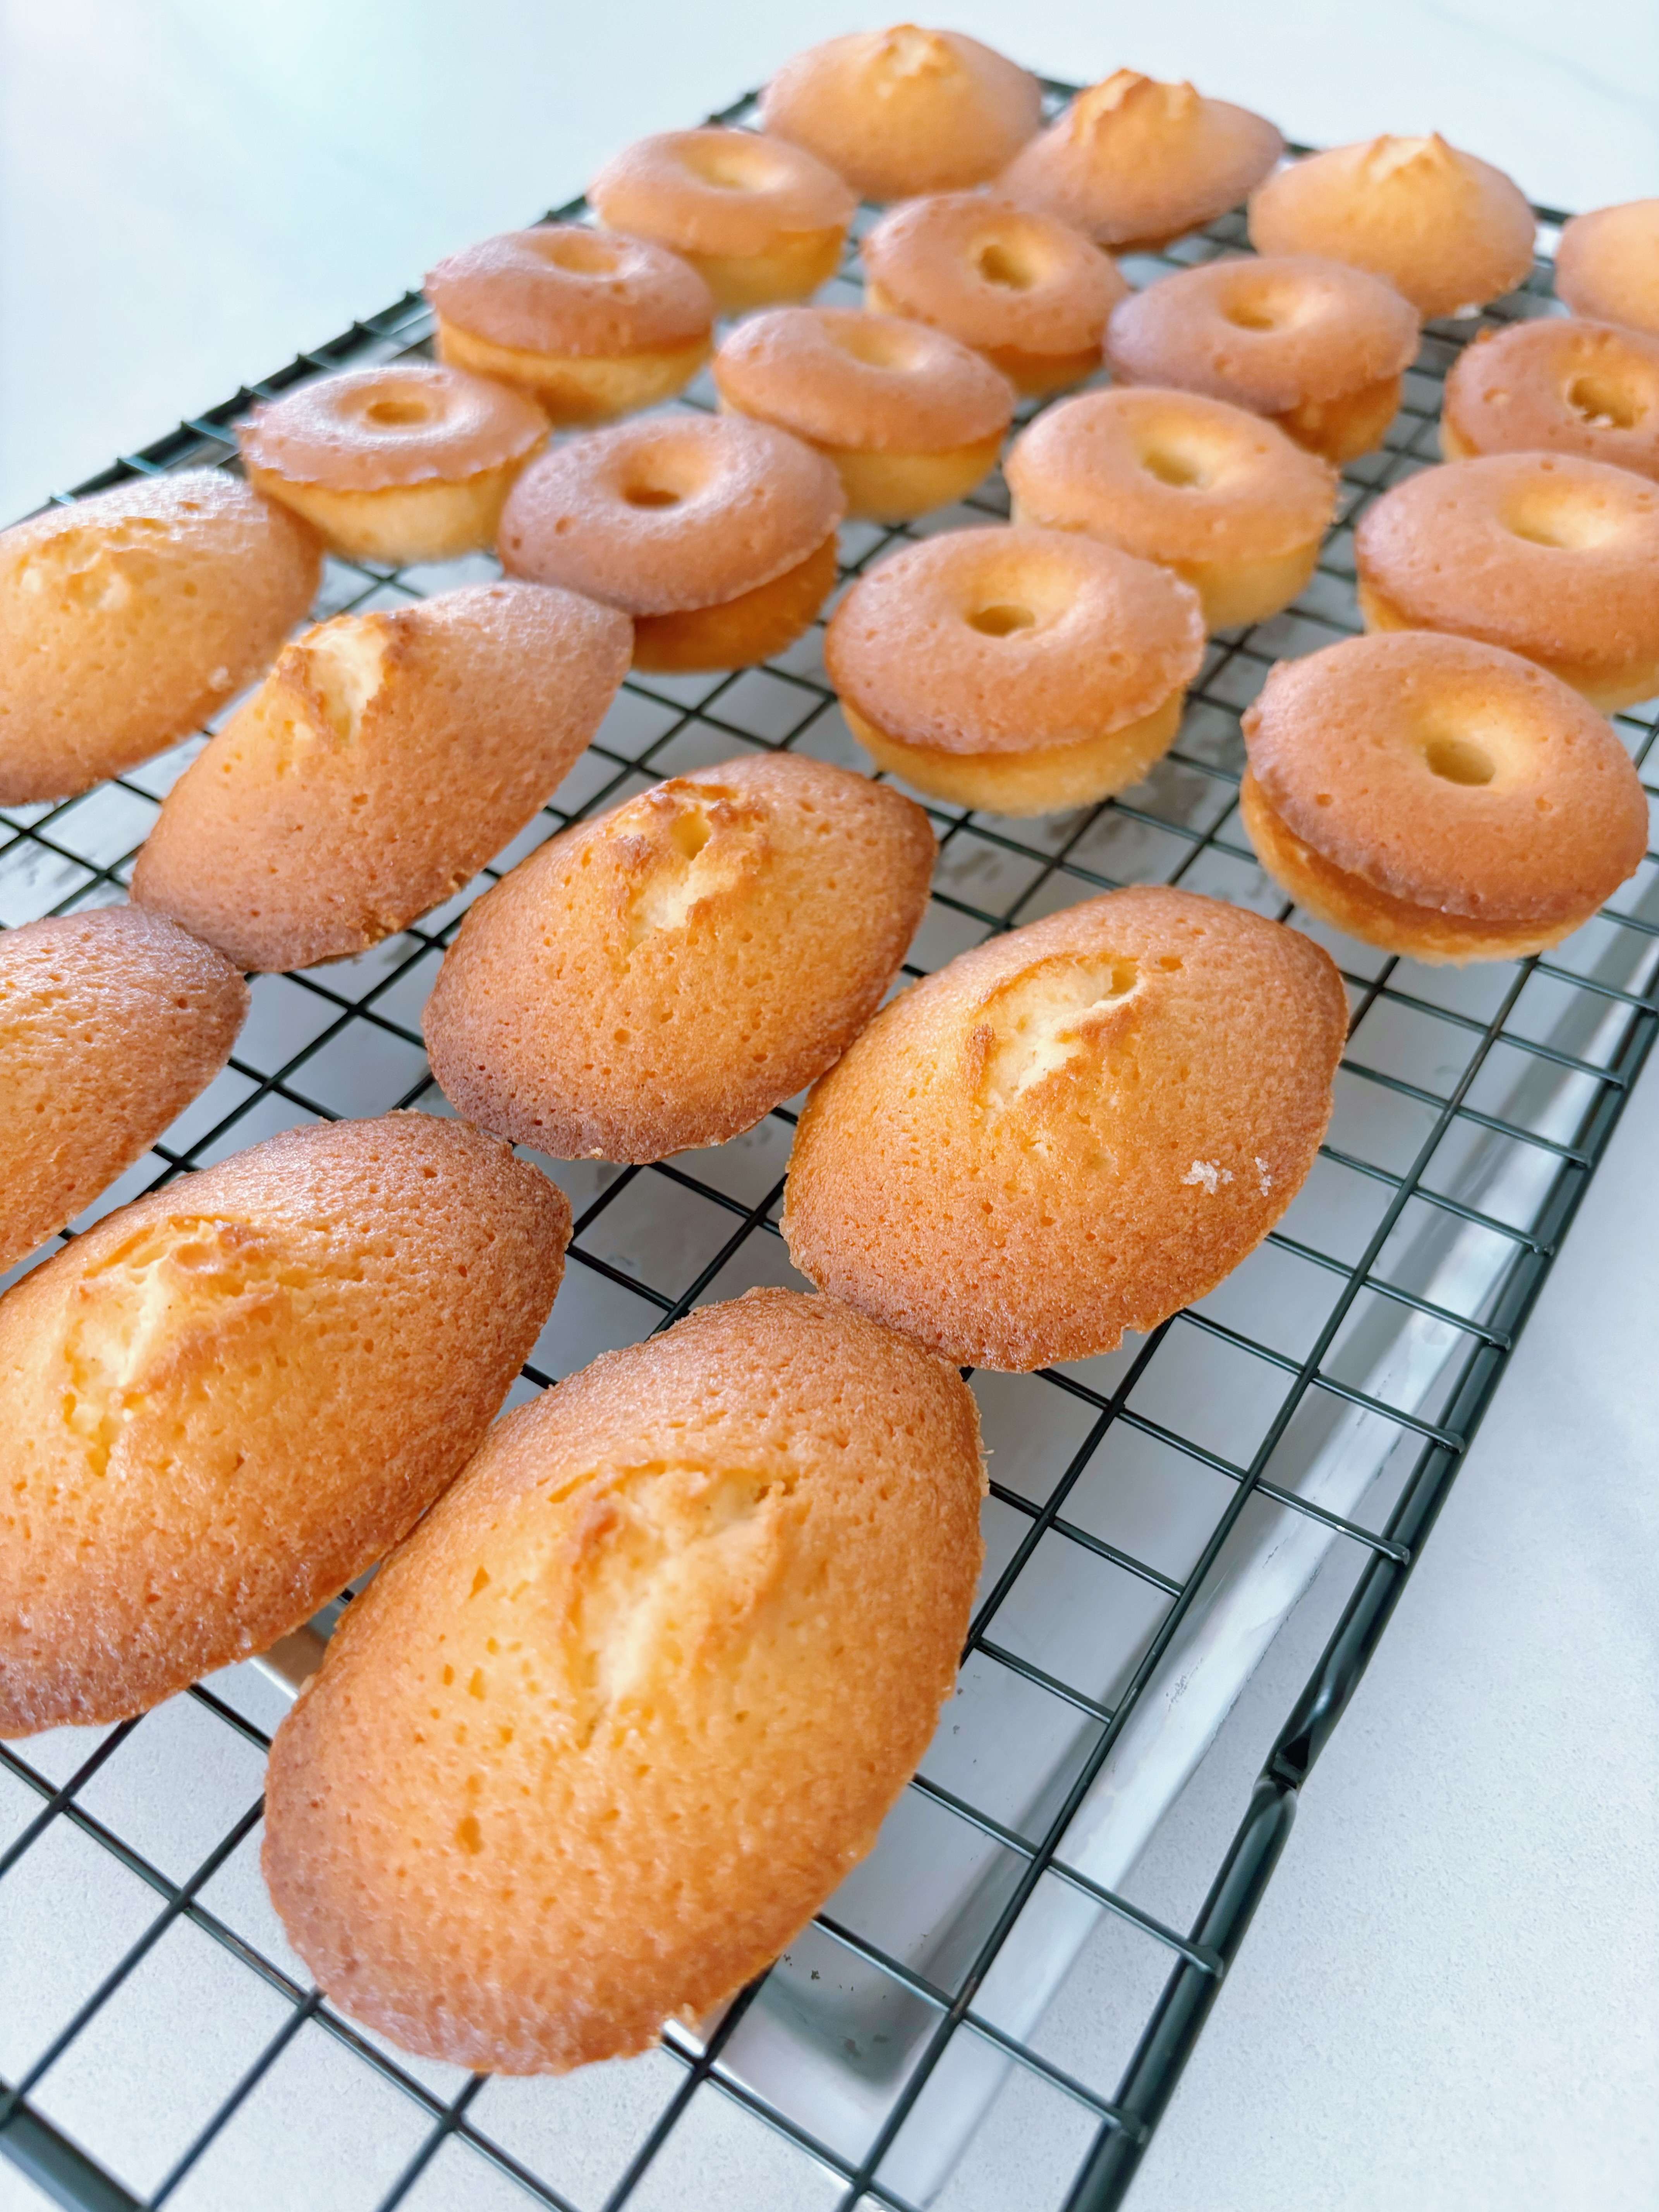
Vanilla Madelines (Thermomix)

Today used cookidoo recipe to bake these lovely vanilla madelines for school. Whole house smells so nice while they are baking in the oven.

Back and resume routine, trying hard to go with my initial idea of reducing processed food as much as I can in their daily meals, and if possible for school snack/recess boxes.


I put balance batter into my minu donut pan as I wan to bake them all at a go. Didnt had time to oiled the pan, luckily all came out easily. 


They are buttery and soft. Smells great and goes well with my cup of coffee. Its so addictive that you cant stop at 1, even hub is complaining. ❤️ Recipe link is here

Vanilla Madelines (From cookidoo)
3.5oz butter, cube
2 eggs
3.5oz sugar (i reduced to 2oz)
3.5oz plain flour
1/2 tsp baking powder
1/4 tsp vanilla paste
pinch of salf

1. Melt butter, 3mins 250F speed 1
Remove n set aside. Use it to oil pan and fridge til needed
2. Put in butterfly whisk. Add sugar, eggs, vanilla, 1min speed 3.5
3. Add flour, baking powder, salt, 5sec speed 5
4. Add in melted butter, 10 sec speed 3.5
Repeat 1more time
5. Pour batter into bowl n cling wrap. Chill for 1hr
6. Put 1 sponnful batter into madeline pan. Baked for 10-12mins 180deg

Monday, November 6, 2023

Thermomix Tomato Eggs


 Made these tomato eggs lately and has been on a come-back often. Kids love it and its easy n light dish for my diet too. 

A lot of people dont know thermomix can actually fry eggs, but of cos without the wok hey. It is more like a cooked version of scrambled eggs? I would totally have these with my brunch platter. ❤️


I have used the same method to fry my brinjal, my bittergourd and the most favourite is to pair with tomatoes! 

Tomato Eggs
4 Eggs, Beaten
Some charsiew bits (optional)
1 Tomato

1. Add enough oil to cover the base of bowl and do the below settings to warm up the bowl
10mins, Varoma, Speed 1

2. Once the oil sizzle, (do not need to wait til 10mins finish), slowly drizzle in the egg bit by bit. 
Can stop halfway through and use the spatula and run through the bottom of bowl

3. Once egg is done, remove eggs 

4. Add tomato, chopped slightly (Or u can chop it or cut into quarters) + tsp of oil
3mins, 120deg, speed 1

5. Add in cooked eggs, charsiew bits and tomato sauce to the sautee tomatoes
2mins, 120deg, reverse spoon speed

Enjoy the dish! 


Monday, February 27, 2023

Thermomix Fried Maggie Noodles


Been a while I haven upload new recipe post! Decided to stirfry some noodles since feeling motivated after sharing my Fried Rice tips and helped so many of our Team AKK big family cooking this simple 1-dish meal anytime they want. 


Randomly, impromptu did a trial and jot down the steps and ingredients. Blessed that my method works and its well-received by the family tonight!


Thermomix Fried Maggie Noodles (video link here)
3pc of Koka Maggie noodles
1 shallot
6-7pc Prawns
100g Minced meat
100g XiaoBaiCai
1Tbsp Sesame Oil
2-3drizzle Fish Sauce

1. Use kettle mode to boil 1l of hot water and pour over the maggie noodles. Loosen them up and pour away once it starts to loosen off (Dont need to soak til its soft)
2. Add shallot and chop - 5secs/speed5
3. Add sesame oil - 5mins/speed1
4. Add minced meat - 3mins/speed 1
5. Add butterfly whisk and add prawns - 3mins/speed spoon
6. Add xiaobaicai - 1min/speed spoon
7. Add noodles and seasonings - 3mins/speed spoon

Enjoy and warm! 


Wednesday, June 1, 2022

Egg Fried Rice (Thermomix)


Been a while I have not updated my blog. Too busy with house shifting, then the Chinese New Year, still settling in and then the PSLE kid. Tiring 😅

Today sharing a simple Egg Fried Rice Recipe that I have done with my thermomix. Using a fried eggs tips shared by my team’s advisor on how to have fried eggs! YES! FRIED EGGS! Not too bad for a TM-version without an oily kitchen. ❤️

Tips for higher success-rate Fried Rice would be using cooled rice, and preferably basmati rice. Using jasmine rice and japanese rice is fine too, but if its not cooled well enough or its too wet, the chances of the fried rice being mashed up is high. So do be careful with your rice prior to making Fried rice. I would reduce 1-2mins of cooking time to ensure less wet and soft rice if you are
not using basmati rice.

You can see the video of the process from my instagram here as the video was too huge to upload. It really quite simple and I will write down the recipe and steps below for you all. 


Made some homemade chicken floss as toppings. Really just dumping meat and seasonings and let my thermomix do its magic. Added in toasted seaweed and seaame for a small portion to use. Yums! Smell so good! And important is you know what goes in this batch of floss and its preservatives and msg free! 

Hope you like my simple sharing for today! 


Egg Fried Rice
2cups Basmati rice (Approx 280g)
2-3tsp Fish gravy
1Tbsp dark soy sauce
Sesame oil
4 Garlic cloves
Ham
Corn kernels

4Eggs
40g Oil

1. Cooked rice as per normal and set aside
(17mins, 100deg, speed 3)
2. Pour in 40g oil
(3mins, 120deg, speed 0.5-1)
3. Once oil is heat up, cook oil for another 10mins while
pouring in egg batter. Pouring batches by batches only when earlier batches is cooked and set.
(10mins, 120deg, speed 0.5-1)
4. Once egg is done, remove and set aside. Add in 4 garlic cloves and chop
(5secs, speed 5)
5. Add sesame oil and saute 
(3mins, 120deg, speed 0.5)
6. Add in Ham and corn kernels
(5mins, 120deg, reverse speed 0.5)
6. Adjust ham qnd corn kernels. Insert butterfly whisk. Add in rice, eggs, fish gravy and dark soy sauce
(3mins, 120deg, reverse speed spoon)
7. Serve warm!


Wednesday, December 8, 2021

Sponge Finger (Dessert Base)


In life imagination and expectations always turns out different. And some people maybe more artistic, or creative or something that is your own strength.


I was never the artistic person, a bit of creative maybe but I always tried my best. LoL! And remember never to be dishearted when things dont go your way, somehow some stuff are never meant to be! The same goes for friendship, relationship and even kinship. Toxic people just let go, mingle less if you cant. Year is coming to an end, lets set off to a more positive vibes year in 2022! Ok, getting a bit heavy now! 😅


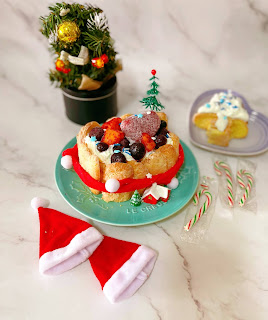
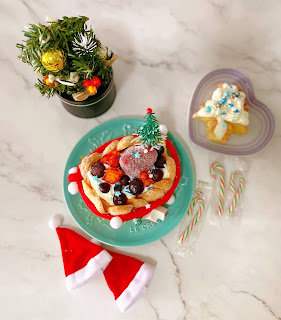
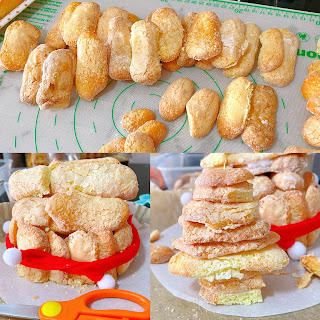
Today I tried making some sponge fingers from scratch as I wan to build my own christmas house. Turns out I didnt have the flair for it so I decided to use it as a base for my dessert! 


Since I have some whipped cream and frozen fruits and ta-daaa~~~ Our after dinner dessert is ready! Now chilling in the fridge for us to eat later on! 😋😋 After putting them in a box, looks like a snowglobe to me! Actually its a great gift to make for your friends too!


I tried 2 ways of baking the sponge and as it is too light, the rack on top of paper works better for me! And freshly baked sponge fingers is not so dry as compared to storebought and taste so much better! So here today, sharing my sponge fingers recipe along with my failed house and tree pics! 🙊

Sponge Finger (recipe adapted from Cookidoo)
4 whites
4 yolks
80g icing sugar
Pinch of salt
120g plain flour

1) Sift flour and set aside
2) Whip whites and salt til soft peaks
3) Continue whipping whites and add in icing sugar gradually, til glossy stiff peaks
4) Fold in flour gently and lightly, without overmixing
5) Pipe onto baking paper your desired sizes
5) Sprinkle icing sugar on the piped fingers and rest 5mins
6) Preheat oven to 180deg
7) Bake fingers for 10-12mins x 180deg or til top is nicely browned

#priscillacooksnov

Tuesday, December 7, 2021

Sea Salt Chocolate Tart w/Christmas Choux


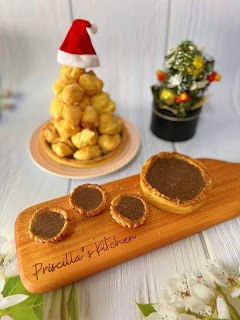
 Actually wanna make some sea salt chocolate tart and last nite during a meeting, we were talking about christmas tree made up of choux! 


Then it somehow brought me thinking to combine them
both and also have a chance to try out fixing a christmas tree with my choux! 


I would prefer using chocolate callets as the hershey chips cant really set well. It is more like flowy chocolate filling when u bite it! Tastewise, it is good cos I am using the sea salt chips! So tasty with the bits of sea salt sprinkle on top of the tarts! 


I lightly assemble the choux on my 6” tart, filled with the chocolate filling. Carefully adding some toothpicks for those choux above to secure them! Wearing a santa hat for my tree! Ta-daaa~~ So cute!!!

Sea Salt Chocolate Filling
125ml Whipping cream
110g Hershey sea salt choc chip (works better with choc callet)
Sea salt for garnish

Choux recipe is here
Tart recipe is here

1) Put water in pot and put in steam rack. Saute mode Hi
2) Place pot with whipping cream on rack and wait for water to bring to boil
3) Add in chocolate chips, close lid and off power. Wait 3-5mins
4) Open and stir them well. Used as desired. 

Monday, December 6, 2021

Simple Early Christmas Dinner


A pre-christmas trial dinner today! 

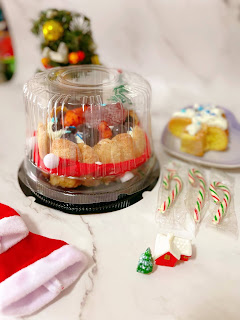
Baked a orange marinated chicken, along with homemade herbs & garlic butter shortcrust pastry and a homebaked orange cake with creamcheese frosting 😋


Chicken is so juicy and nicely marinated with the orange juice and herbs. Loved to baked chicken in my ninjafoodi, always gives me crispy skin and juicy meat! 


Hub love the shortcrust pastry christmas tree, the homemade herbs & garlic butter was so tasty! I think oldest love it too as she asked for more of it! I totally love the spread cos it makes the whole pastry smells and taste so great! Crusty and filled with garlicky herb fragrance ❤️


The orange cake was moist and goes super well with the creamcheese frosting! I love the slight tangy taste from the creamcheese frosting that compliments the orange fragrance from the cake. My eldest says ‘The white thing is so GOOD!’ and I agree with her too! 

So what did you had for dinner today? 😋😋 Now I am stuffed! 

Orange Baked Chicken
1 orange, juiced
Some orange wedges, thinly sliced
1Tbsp onion powder
1Tbsp dried parsley flakes
Pinch of black pepper

1) Marinate and rub above seasoning all over chicken and stuff some oranges inside chicken
2) Bake chicken 180deg x 30mins
3) Flip and bake another 15mins 

Herbs & Butter Garlic Christmas Shortcrust pastry 
30g Butter
5-6 garlic cloves, chopped
1Tbsp mixed herbs
Shortcrust pastry

1) Mixed butter, chopped garlic and mixed herbs
2) Put shortcrust pastry on baking paper and spread the above butter mix on 1 side of pastry then fold and seal edges
3) Use a cutter to cut out the shape of a christmas tree 
4) Cut the sides and twist them
5) Bake at 180deg x 25mins or til its nicely browned.
Orange Cake with Creamcheese frosting
(unable to share cake recipe as its a private bake along class)
Creamcheese frosting
42g creamcheese
30g butter
50g icing sugar
1tsp vanilla extract

1) Mix all above ingredients with a handwhisk til smooth.
2) Use as desired