Monday, July 22, 2019

Danish Butter Cookies III


Tried another recipe as itching to try some variation. Went to this recipe blog which I love to find interesting recipes to try! Saw his butter cookies nicely baked n piped makes me wanna try them! 

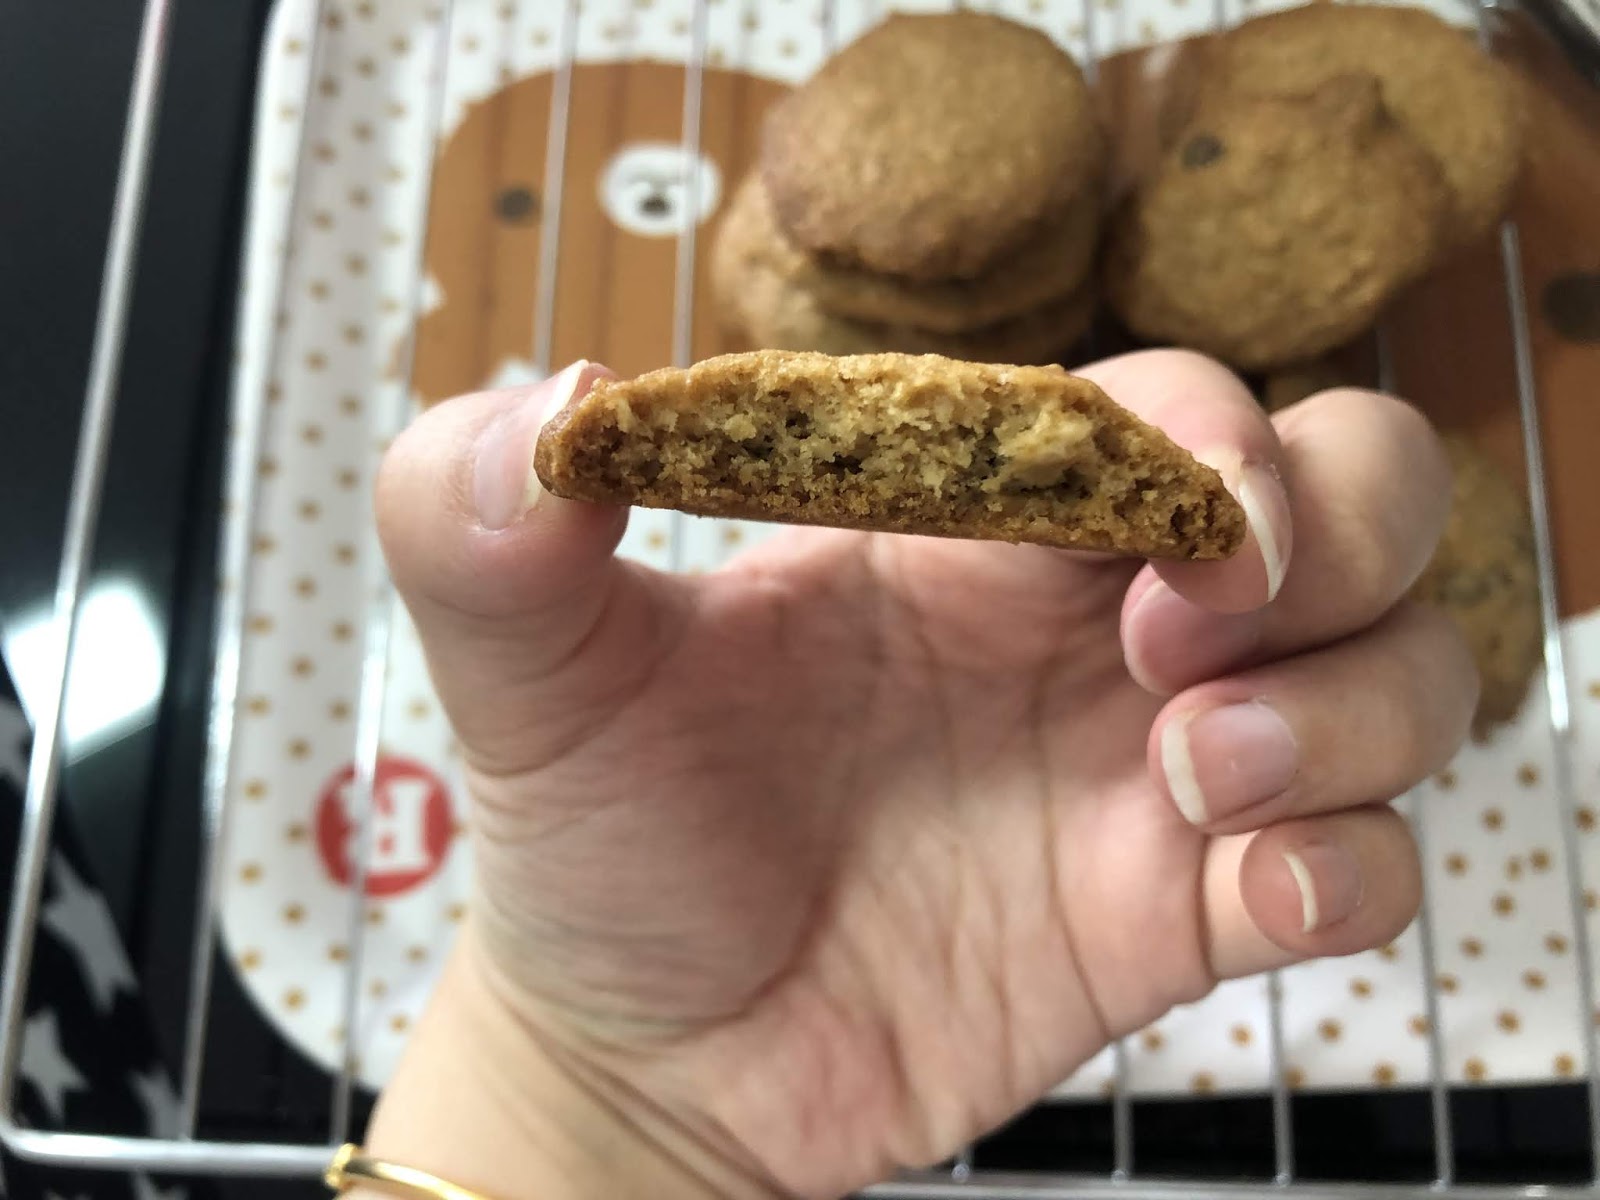
I halve and adjust the recipe slightly as I wanna try a small batch to see the taste and texture. Added some liquid although recipe doesnt require. And I have to say, I love the crumbly feel with the crunch! It doesnt tatse so floury and easily crumbles which is good for kids to hold n eat. 

I am using lescure butter and it comes with a light hint of butter fragrance. Added some pink salt as per recipe calls for, reduce a bit of sugar which I think can reduce a bit more. Overall, quite satisfied with this variation. Time to try back on my last 2 attempts to see which suits me best! 

Danish Cookies (adapted and adjusted slightly from BrownEyedBaker)
120g butter, soften
45g sugar
1/2 beaten egg
1tsp vanilla extract
1/2tsp Pink salt
144g Plain flour (I mix in 15g cake flour as I did not have enough plain flour)
1.5Tbsp coconut milk

1) Mix butter and sugar til fluffy
2) Add in egg, vanilla and salt and mix it well
3) Fold in flour til no streaks of flour can be seen
4) Stir in coconut milk
5) Pipe or roll into balls and bake at 180deg for 20mins

Wednesday, July 17, 2019

Banana Chocolate Muffins


Needed to clear my banana so decided to bake banana chocolate muffins for the kids as breakfast tml. They love having something else than their usual bread with butter spread. This will be a hit with them as it is chocolate base. Nothing will entice the kids as much as CHOCOLATE! 


This recipe is simple and uses 1 bowl. I mixed everything and all done in like 15mins. Send to the oven for a good 30-40mins while I went to cook my dinner! The smell of chocolate and banana is yummy! And hopefully it taste just as nice too!!


Omg! The exterior is a bit crusty but inside so soft and yum! Not overly sweet and the choco taste is rich enough!


Banana chocolate muffin (Adapted from DomesticGoddessWannabe)
2 ripe banana, mash
60ml oil
1 egg
187.5g Cake Flour
29.5g Cocoa powder
1tsp Baking Soda
1/2tsp Baking powder
100g Sugar

1) Mix banana, oil n egg well
2) Add in dry ingredients and mix well. Do not overmix.
3) Bake at 180deg for 20mins. Cool before storing.

$250 Neiman Marcus Cookies


Been wanting to bake cookies and has been looking at those recipes that I have baked before. Search google a bit and chanced upon this $250 Neiman Marcus Cookies!! Sounds so yummy and I am so intrigued. The rolled oats convinced me as it tells me its ‘healthier’ junk food! 😂😂 Haha~

Using my atas butter, Lescure, I tell myself I must bake and try it! I reduce sugar slightly for both white and brown sugar as I remembered angmoh recipes usually on the sweeter side. And I omit the nuts as I wanna give some to my 3yo toddler too! Nuts will be a bit dangerous for him, worried that he may choked on them. 

I didnt use a mixer, instead all using a handwhisk as I wan to minimise the amount of equipments used and also want to be fast! (I always sneak a bake when my 3yo naps) Butter was left to soften at room temp helps. Managed to mix it up quite well! 

Sending them trays by trays and playing with the amount of dough each batch to see the size that I want. 1 tablespoon size gives a bigger cookie, 1.5 teaspoon seems a better size for my preference. The dough stretches while baking so good to space them out slightly! And when they are hot out from oven, they are slightly soft to touch. But crisp up well and crunchy once cooled!! (Left is 1 tablespoon and Right is 1.5 teaspoon)

Totally love the taste! Please do give this recipe a try! Yums!

$250 Neiman Marcus Cookies (adapted from BrownEyeBaker)
202.5g Rolled Oats, blended to powder
250g Plain flour
1tsp Baking Powder
1tsp Baking Soda
227g Butter, room temp
150g White sugar
170g Brown sugar
2 eggs
1tsp vanilla extract

Chocolate chips of your preference: I use a mix of salted caramel chips & dark choc chips

1) Whisk butter and 2 sugar til fluffy
2) Add in eggs 1 by 1, followed by vanilla extract
3) Add in flour and blended oat, mix well
4) Fold in chocolate chips
5) Preheat oven to 180deg
6) Scoop 1.5tsp batter and leave some space. Bake for 20-25mins til cookies are nicely browned. 
7) Cool and store in airtight

Tuesday, July 16, 2019

Pandan Ogura Cake


Didnt have much pic as was rushing to pack then as a gift for a friend. Thankful for all her blessings each time she pop over!  Showered with lots of love from her snacks. A simple way of saying Thank You!

She mentioned she like Pandan Chiffon but I wanna try baking ogura! Apparently Chiffon texture will be slightly drier as compared to Ogura. Ogura is finer in texture and moist to bite. Am so intrigued to try them out!! 

I chanced upon this recipe. Seems simple and easy to follow. And she has many cakes recipes that I have tried before too! Definitely wont go wrong! 

It is light, hint of mild pandan taste and not very dry. I would bake this again to perfect the texture and taste! 

Pandan Ogura Cake (adapted from PhongHongBakes)

5 yolks
1 egg
65g cake flour
1tsp Pandan Paste

5 whites
75g Sugar

1) Beat whites to medium stiff.
2) Add all cake batter ingredients and mix well.
3) Fold 1/3 meringue into batter. Pour batter into remaining meringue and fold in gently.
4) Bake for 40-50mins at 150-160deg til cake is browned nicely and skewer comes out clean.
(Bake in baking tin lined with baking paper)
5) Invert immediately and cool.

Friday, June 28, 2019

Homemade Wanton


Always made them and freeze for fast meals but always never write down hw much seasoning to put in. Thus some attempts is bland, some attempts just nice. So this round I make sure to record down what I added. Its jus a simple documentation for myself! 


Serving them with corn & meatball soup for tonite’s dinner! Yumss!!


Filled with ingredients! 


Homemade wanton (Makes 40)
250g minced pork
6-8 prawns, chopped
3sprig of spring onions, chopped
1 carrot, chopped
4Tbsp light soy sauce
3Tbsp sesame oil
2Tbsp huatiao
1.5Tbsp cornflour
Pepper

Wanton wrappers
1) Mix above ingredients together and wrap in your preferred style.
2) Boil for 8-10mins til wanton floats and colour of skin lighten. Serve warm

Carrot Cake Sticks


Been wanting to eat this but this is so old school that its so rare to see. Tried it at Shunfu market before but still prefer the ones I always eat at Lorong Ah Soo market since I was a teen. 


I google and read a couple of recipes, it uses water, rice flour and salt for taste. Some cook the mixture before steaming, some just steam it directly. I choose the latter, to steam directly as I am worried about the sticky pots to deal with. 😂😂😂


I am using 3:1:1 ratio for radish:water:rice flour. I omit salt as I wanted to try seasoning it with ikan billis powder. Apparently it is not saltish enough but then the kids enjoyed so much. I guess anythinf fried doesnt go wrong with kids right?! Heee... 

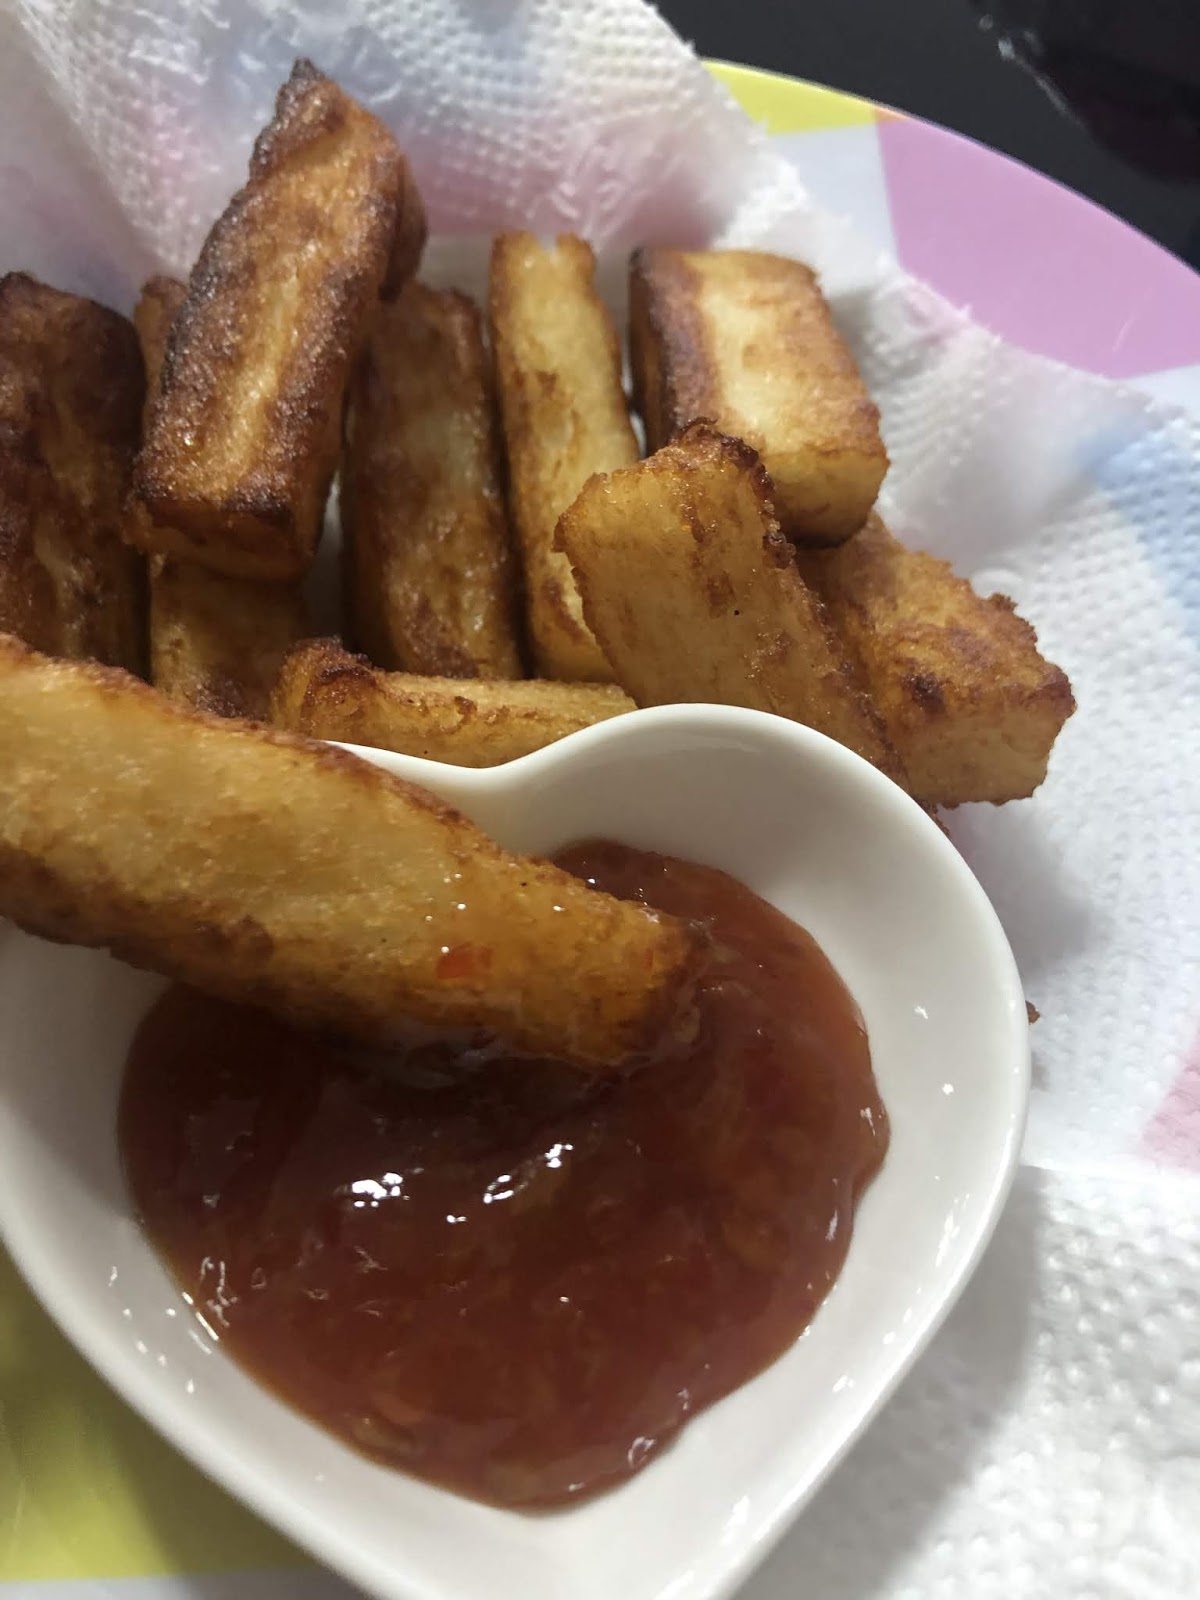
For me I enjoy it with some thai chilli as suggested by my group of friends. It makes it taste better than on its own. The texture is crispy and soft inside. If i had added salt, I think it would somewhat taste quite similar to those selling outside. The insides can be a bit more softer to resemblance those that sells from Lorong Ah Soo. Perhaps I can up the lower the ratio of rice flour to 0.5 and see if it makes any difference to the texture. 


My 3 kids, including the youngest had it plain and still want to go for more. Enjoying it so much! Kept another portion for stir frying them. Lets wait and see how it goes! 

Carrot Cake 
A) 300g grated radish 
100ml water

B) 100g rice flour
100ml water
1tsp ikan billis powder, can be replace by 2tsp salt

1) Grate radish and squeeze dry. Put on plate with 100ml water and steam for 30mins. Cool
2) Mix (B) and put cooled steamed radish in and mix it well.
3) Prepare wok for steaming. Put baking paper on baking tray and pour mixture in.
4) Steam on med-high fire for 45mins til it sets
5) Cut cooled carrot cake into strips n panfry each side til browned. Serve warm!


Thursday, June 13, 2019

Windsor Bread


Recently I bookmarked this recipe as I really love to see those soft fluffy buns with the shreds when you pull them apart. And most interestingly is that this bread only need 1 proof! Super good for me to use when I can just prepare and shape then leave it to proof while I go busy with other stuff!  


Today I prepare and make the dough while having lunch. By the time it has done its job, i left it to rest before start to shape and leaving it for another rest. And I need to mention, the dough is super easy to work with! Not overly sticky and minimal amount of flour dusting needed!!

I am making mini burger buns and sausage buns. Planning to have them for dinner. I got some mini beef sliders and burger cheese, has been wanting to strike them off my ‘to-do’list! ✌🏻✌🏻

I send them to bake when I was still struggling to make my youngest nap. Arrgghh. I think I could have overbaked by 5mins as the top has browned too much. But the inside is still soft n fluffy. Love it! Perhaps need to try it again and monitor the baking. Tastewise, I love the mild sweetness that comes with it! 

Topping it with my beef sliders, cheese, tomato and mayo dressing! Serving with a sides of hash browns and fries! Lovely!! 

Windsor Bread (adapted from Oladybakes)
225g Bread flour 
25g Cake flour (I use top flour) 
8g Milk powder
25g Sugar
140-150g water (I use 140g fresh milk)
1 egg yolk
1/2 tsp salt
3/4 tsp yeast
25g Butter

1) Using my breadmaker to knead. I dump all ingredients except butter and yeast. 
2) Once it forms a dough, you can add in yeast and knead for 5mins
3) Add in butter and knead for another 10-15mins or til it forms an elastic dough and let it rest for 10mins
*I added a tbsp of bread flour here as it was too wet
4) Cut dough in preferred portions and shape into a ball. Rest for 10mins
5) Roll out dough to release air and shape accordingly. Proof for 40mins
6) Bake at 180deg for 20mins

Wednesday, June 12, 2019

梅菜扣肉 (Preserved vegetables w/Pork belly)


Been craving for this 梅菜扣肉 since 2 weeks back and decided to cook myself. Outside usually more sweet or salty which i dont really like. 

I love to stew mine with pig intestine and chicken liver as I love to eat them! Everytime i braise or stew something, I need to add them to my dish! Lol! 


The preserved vegetable comes salted. So you need to wash and open up the leaves stalk by stalk ti make sure you wash them clean of sand, and also to blanch them after washing to get rid of the saltish-ness. There was once i forgot to blanch, oh my, its so salty til i had to keep diluting with water!! After that I wash and rinse them again, squeeze away excess water then cut into portions. Approx a thumb length each. 


Love to have then with plain rice, serve warm and with my favourite. If you like braised eggs, do boil some n leave it in the stew ❤️❤️


梅菜扣肉 (Preserved Vegetables w/Pork Belly)
300g Pork Belly, blanch and wash before cut into strips
300g Pig intestine, blanch
300g Chicken liver, clean
2 packets of sweet preserved vegetables
1 clove garlic, washed
3 thick slices ginger
1Tbsp sesame oil
2-3Tbsp oyster sauce
4-5Tbsp Dark Soy sauce
1Tbsp huatiao
Pepper
Water, enough to cover the ingredients tip.

*Adjust the oyster sauce and dark soy sauce according to your taste
**Add more if drying up.


1) Stir fry ginger and garlic in sesame oil
2) Add in pork belly and fry til turns whitish in colour
3) Add in dark soy, oyster sauce, huatiao and mix
4) Add in enough water to cover pork belly and bring to boil
5) Add in preserved vegetables and mix well. Add more water to cover ingredients and bring to boil
6) Add in pig intestine and stir. Simmer for 30-45mins and check on pork belly.
Once chopsticks can poke through easily means its cooked. Take out n cut into smaller pieces. Do the same for pig intestines
7) Add in chicken liver and let it cook til done, scoop out and add before serving


Tuesday, June 11, 2019

Baked chicken with creamy mushroom sauce


Decided to grill chicken since weeks back, ordered from my usual poultry supplier and got them to ‘butterfly’ the chicken for me. 


This round i decided to try marinating with this BBQ seasoning that I chanced upon. I added some those spices in the pic, approximately 2/3Tbsp each, 1.5Tbsp sesame oil & lemon juice. Massage them well and leave it to freeze overnight. Thawing them the next morning so that it will ready by dinner time! 

I decided to make my own creamy mushroom sauce, as a backup if the chicken is not tasty enough and also to make the meal not too dry for the kids. I blanch some pasta & serve with salads on the sides too! 


Stir fry the onions til transparent in olive oil then dump in the nushroom to fry til change colour. Adding in the oyster sauce, cooking cream, pepper, parsley flakes. Added 2Tbsp water and thicken the suace. 


Baked the chicken for a good 1.5hrs or less. Need to keep looking at it to make sure top dun charred. Lovely colours it turns out. Yummy!!


Baked Chicken with creamy mushroom sauce
1 chicken, butterfly cut, wash and trim off fats
1Tbsp BBQ seasoning
1Tbsp parsley flakes
1Tbsp grounded ginger
1Tbsp grounded garlic
1Tbsp Pepper
1.5Tbsp sesame oil
1.5Tbsp lemon juice

1) Marinate chicken, preferably overnight or at least 4-6hours
2) Bake 200deg for 1-1.5hours til chicken is nicely browned

Creamy mushroom sauce
3 Shitake mushroom, sliced thinly
1/2 Onion, sliced
1 box cooking cream
2Tbsp water
Cornstarch
Pepper & Parsley flakes, moderate

1) Stir fry onion with olive oil til transparent
2) Add mushroom and stir fry til soft
3) Add oyster sauce and cooking cream
4) Add water, pepper and parsley flakes
5) Bring to boil, thicken sauce


Monday, June 3, 2019

Durian Chiffon


Totally need to try this MSW durian chiffon as I always wanted to bake but couldnt leave some behind to make as always finish up the fruits! This round hubby bought me 5 MSW so I took some for making them! 


 Love how they rises in the oven! But then I forgot to overturn them after baking as I was busy fighting with the youngest for his nap. The center sunk badly. So sad! 😭😭

Luckily it didnt affect the taste. Texturewise, I think cos I added 30g more of the durian flesh, it is slightly more on the moist side. Not the usual dry texture whereby you may choke if u gobble it down fast. (Not sure if u get what I mean) Tastewise, love the fragrance of the durians and the bits off durian fruits in it. Slightly on the sweet side, wondering if its cos of the MSW is really sweet or becos of the extra 30g!


Managed to bake 2 6” cakes so gifting them to my neighbours for snacks! Hope they enjoy it! Will definitely bake again as I still have MSW in the fridge! Yummy!! 

Durian Chiffon (adapted from AuntyYochana)
5 whites (using grade AA big eggs)
100g sugar

5 yolks (using grade AA big eggs)
140g plain flour
150ml coconut milk
180g durian flesh *(original recipe calls for 150g)
50g sugar
1tsp vanilla essence
4Tbsp corn oil
Pinch of pink salt

1) Mix egg yolk batter well
2) Beat egg whites & sugar til still peaks
3) Fold in whites in 2 addition and bake at 180deg for 40mins or til top is nicely browned