Showing posts with label Dim Sum. Show all posts

Tuesday, November 23, 2021

Live Cooking - Yam Cake & Quinoa Salmon Salad (Thermomix)


Did a simple lunch theme today, having a light lunch out of the norm from rice and noodles. We did a Yam cake, with a slight modifications and a Quinoa salad to my family preference. Let me share what I did today for them, link to my Facebook replay is here.


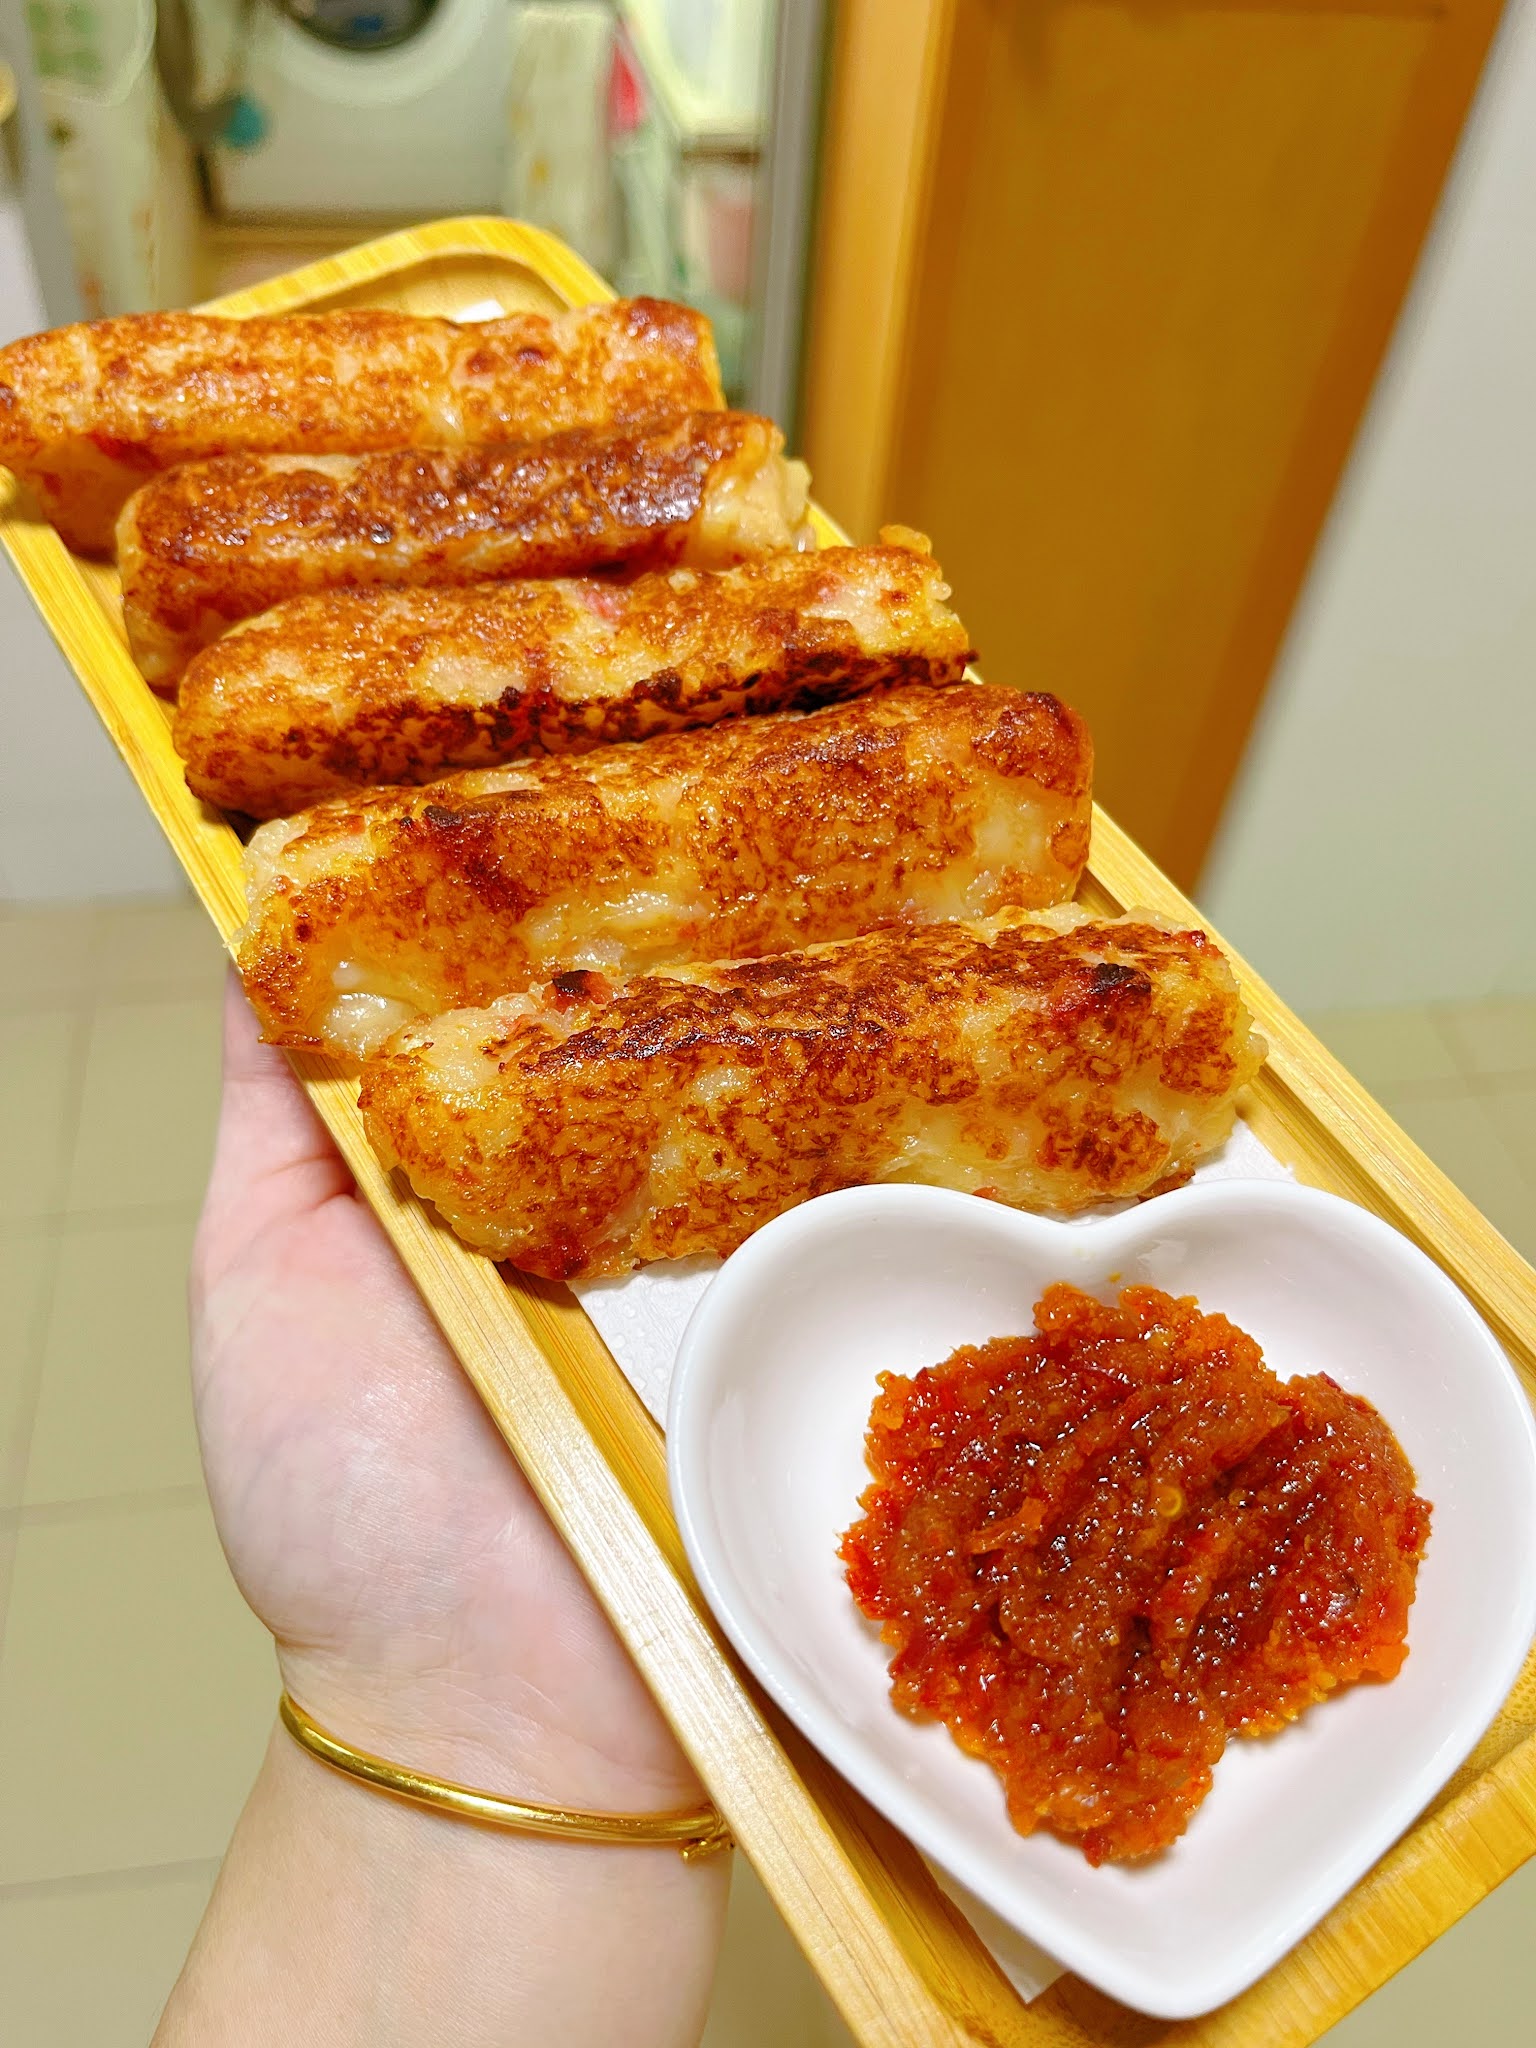
I served the steam yam cake with sweet sauce and the nasi lemak chilli I made previously. Totally loving the combination and best is, Grandma approved! She love anything Yam but of cos minus those sweet dessert but the traditional kind is her fav. I was surprised she went for 2nd helping after the first and her bowl of Quinoa. You wouldn't know how happy I was inside SECRETLY. LOL.


Next, I did a show of layer cooking possible with 2 types of cuisine. I did a Quinoa salmon salad. The original recipe uses steam chicken but I prefer salmon over chicken and added some of the family favourite in a salad to make it that suits our family tastebuds.

The sauce was well-recieved by me and the kids plus grandma, but not so much for my hub. I felt its the parsley that is quite overpowering so maybe if you do give it a try, do try going lesser for the parsley dressing or you can omit it too. 


Added baked potatoes and salmon cubes, along with my favourite mushrooms. Thankful for my wonderful kitchen gadgets that makes my life so much easier and hub feels the same way as I do. Love the colour of my salad today, what about you?

I have included a manual steps for those who don't own a thermomix yet. For baking, I am using my ninjafoodi. You can replace with air fryer or oven, but adjust accordingly. Enjoy!

Yam Cake (recipe adapted from Cookidoo, adjusted to my preference)
60g Rice flour
12g Cornflour
120g Water
50g dried shrimp, soaked
2 sausage, diced
400g yam, cubed
50g water
1/2 tsp sugar
1/2tsp 5 spice powder
Pinch of pepper

Manual Steps: (follow cookidoo with the reduction in ingredients as per above)
Add dried shrimps and sausage and blend it coarsely.
Saute for 5mins. 
Meanwhile mix rice flour, corn flour and 120g water in a bowl and set aside.
Add yam cubes and seasoning with 50g water to the dried shrimps and sausage and stirfry them for 10mins.
Add in rice flour mixture and and mix well.
Pour out onto prepared tin and steam for 20-30mins. Serve warm or can panfry for a crusty exterior.

Quinoa & Salmon Salad (adapted from Cookidoo with modifications)
100g Quinoa
300g Trout, cube (you can replace with any meat or seafood of your choice)
Mushrooms
3 Potatoes, cubes
Steamed vegetables (I used corn kernels, broccoli, crab sticks)
Dressing (Parsley oil)
1 clove garlic
3-4sprig Parsley
40g extra virgin olive oil
1/2 tsp salt
2-3 Lemon, zest only (I omit)
Mustard dressing
1tsp Djorn mustatd
1tsp honey
2tsp apple cider vinegar
10g water
30g extra virgin olive oil

Manual Steps: (follow cookidoo with the reduction in ingredients as per above)
Do dressing for parsley and blend it well. Set aside
Repeat for mustard dressing and set aside.
Bake potato cubes, spray some oil at 160deg x 15mins. Toss and bake another 15mins 
Once ready, remove and set aside.
Add in salmon cube, mushrooms and bake for 10mins, sprinkle some salt and basil flakes.
Once ready set aside.
Cook quinoa as per package instructions and steam above vegetable of your choice.
Assemble ingredients above and serve with dressing either warm or chilled


Friday, November 12, 2021

Radish Cake (Thermomix)


Finally had time to do this! Oh my! So effortless as compared to doing it manually previously! This round I followed recipe closely and didnt omit any salt.  


I used rectangulat foil to steam as well as my silicon moulds from thermomix to steam them! Nicely steamed and I couldnt wait! Just had to pop them in and panfry a few to try! A tad salty cos I added 50g of dried shrimps, probably I can cut down 1tsp of salt! So do take note if you adding more dried shrimps. 


The outside is slight crusty with soft interior. Very flavouful and yummy le! Even grandma gave thumbs up except for the salty part. SHE DIDNT EVEN KNOW I MADE THESE! Shows how good it is right! 🙈

Wanna see how easy it is to make them! Watch my facrbook replay for the live cooking here! Follow me, I have loads of live cooking weekly! 

Radish Cake (Thermomix) - reference back to Cookidoo
30 g plain flour 
150 g rice flour 
2 tsp salt 
1400 g water, plus extra for soaking
500 g Chinese white radish, peeled and cut into pieces (4-5 cm - see Tips)
2 eschalots 
30 g dried shrimp (I used 50g so reduce the salt)
30 g vegetable oil 
2 Chinese sausages (lap cheong), cut into thin slices
2 tsp light soy sauce 
20 g caster sugar 
2 spring onions/shallots, cut into thin slices

1. Place a bowl onto mixing bowl lid and weigh plain flour, rice flour and 200 g of the water into it. 
Add salt, stir to combine and set aside. 

2. Place radish into mixing bowl and grate 5 sec/speed 5. Transfer into Varoma dish, squeezing out as much liquid as possible, then set aside to drain. Rinse mixing bowl.

3. Place eschalots and dried shrimp into mixing bowl and chop 10 sec/speed 6. Scrape down sides of mixing bowl with spatula.

4. Add oil and sausage then cook 5 min/Varoma/speed 1, without measuring cup.

5. Add drained radish, soy sauce, sugar and 200g water, then cook 15 min/Varoma/speed 0.5, placing simmering basket instead of measuring cup onto mixing bowl lid.

6. Add reserved flour mixture and mix 1 min/speed 2. Line a loaf tin (20 x 10 x 5 cm - see Tips) with baking paper, allowing plenty of paper to hang over the sides. Transfer mixture into prepared tin and smooth the top. Cover with overhanging baking paper. Clean and dry mixing bowl.

7. Place remaining 800 g water into mixing bowl and place Varoma into position. Place loaf tin into Varoma, secure Varoma lid and cook 40 min/Varoma/speed 1. Set Varoma aside and allow loaf to cool completely.

** You can chilled and cut into slices if u wan to panfry or deepfry them**

Friday, April 9, 2021

Crispy Cheese Shrimp Parcels


Wanted to make Thai shrimp cake but decided to go for shrimp parcels. Wrapping whole shrimp in shrimp paste, 1 for each of us ❤️


I am using the ready cheese shrimp paste and added some simple seasonings. I love how crunchy the shrimp parcel is! Outside is crispy with the crunchy do~ing do~ing of the shrimp meat! So love it!! 


Very simple and non oily way of making these Shrimp parcels! Jus aircrisp them in my Ninjafoodi and its done in 12mins!!! 👏🏻👏🏻 Say byebye to no greasy kitchen! 


Crispy Cheese Shrimp Parcels
6 Shrimps, deshelled leaving tail on
2pkt Cheese shrimp paste
1stalk coriander, choppee
1Tbsp panko crumbs
1Tbsp cornflour
1tsp Seaame oil
Pepper

Panko crumbs for coating

Dipping sauce:
1Tbsp mentaiko mayo
1Tbsp garlic chilli
1tsp lemon juice
1tsp parsley flakes

1) Mix shrimp paste with above seasoning and mix well
2) Wrap shrimp in shrimp paste and shape like a ball
3) Coat outside with panko crumbs and lay on airfryer basket
4) Spray oil and aircrisp 180deg x12mins
5) Serve with your favourite dip! 


Monday, March 15, 2021

Cheesy shrimp paste beancurd


Add on to our dim sum lunch ❤️ Added cheesy shrimp paste beancurd as 1 of the sides. So crispy and yummy! Kids love it so much and not so oily as compared to deepfrying them. 👏🏻 Quick fix in 8mins!! 

Cheesy shrimp paste beancurd
1pk of beancurd sheets (i got mine frm yong tau foo stalls at wet market
1pk of cheese shrimp paste


1) Put beancurd sheets flat
2) Squeeze the paste on 1 of the sheets and spread them flat then layer with another beancurd sheet and press it tight
3) Put in airfryer basket and bake 180deg x 8mins, flipping them halfway. Serve warm!

Tuesday, April 21, 2020

Egg Tarts


Today woke up about an hour earlier so decided to put the egg tarts into plan! Heee! Have been wanting to bake them as craving for them! This CB really got me so much different craves. So expensive to grab some of the cravings and also too troublesome to get hub to travel out just to satisfy my tamjiak-ness. We are minimising from eating outside food for a while too!


The dough was easy to make but I think I may add 10g more of flour. The weather is too hot and kept on want to melt on me! I had a hard time putting them in the cupcake cases. Haha! Decided to make them in the cases so I can take them out easily. The egg filling was easy to make and I added some vanilla to enhance the flavour! 1 thing to note is I think I have enough filling for 2x dough recipe as I added in the balance egg from making the dough since I was using those smaller eggs from NTUC. 

Sieve them twice, didnt want to be lazy. Then pour them in the tart shell almost 90% filled. Gently tuck them into oven for 180deg x20 mins and another 150deg for 10mins til set! Yums!!


Tarts wasnt so pretty as I tried my best to fit them nicely in the cases. Also need to work fast to prevent melting dough. Some got stick on the cases but luckily still can be taken off! 😋


The inside filling is so soft n wobbly like! Oh gosh! The kind of filling I loved!!! My littlest had 1 immediately and said No Sharing! He gave double thumbs up!


Egg Tarts (adapted from dingoozatfood)
60g butter, room temp (i used unsalted)
30g icing sugar
15g beaten eggs
1tsp vanilla essence
100g plain flour

3 pandan leaves, chopped smaller
85g sugar
80g water
2 eggs (i added in bal egg from the dough)
1tsp vanilla
125ml milk

1) Mix icing sugar and butter til paste like
2) Mix in eggs, vanilla and plain flour. Chill before use
3) Put pandan leaves, sugar and water to boil. Cool
4) Whisk eggs, milk and vanilla together
5) Gently mix in cool sugar mixture. Sieve 2-3x
6) Roll dough and cut into 6 portion. Fit them in tart cases well
7) Prick holes with fork and pour in egg filling til 90% full
8) Bake at 180deg for 20mins then reduce to 150deg for 10mins

Friday, March 13, 2020

Easy Chee Cheong Fun


Saw this in 1 of those cooking facebook group, using vietnam rice paper to make chee cheong fun! Looks simple and easy and I have been wanting to try them out! 


This is the 1 I am using, around $1-ish from NTUC.  I took out about 8-10 sheets for today’s portion. It was quite easy as only need to soak them for a while and it will soften up for use. Only thing to note is that have to be careful in rolling and splitting the sheets. It is quite fragile and tear easily. It doesnt matter if you cant fold it neat cos its alright. Just briefly roll them up.


I would suggest brushing the plate with some oil before putting the roll sheets on the plate. It sort of sticks a bit after steaming. 


I mix some water with seasonings and drizzle over the steamed chee cheong fun. Yummy! See how soft it is after steaming! Its really nice and best to serve warm! 


Balance charsiew were made into wanton mee for lunch. Recipe can be found here


Chee Cheong Fun
10 sheets of rice paper
Some char siew bits
Some prawns

Sauce:
2Tbsp light soy sauce
1Tbsp sesame oil
4Tbsp water

1) Soak rice paper for 5-10mins in a bowl with drips of oil
2) Take out each piece carefully and sprinkle topping then briefly roll them up
3) Place on plate, lightly oiled. Steam for 5mins once water starts boiling
4) Drizzle sauce over and serve warm


Monday, July 22, 2019

Kap Zhong (Youtiao w/Glutinous Rice)


A lovely friend showed us this and ask where to find in SG. She love this simple snack from malaysia. So being curious, adventurous and many point of kaypoh-ness, I went to google about it and followed a video recipe that I found!


Dough was quite sticky to handle. Wasnt really that easy to ‘swissroll’ the glutinous rice in the dough. But the preparation work and of cos the frying part was easy. I rub my hands with oil so its easier to work but the glutinous rice kept sticking to my fingers. Tried my best to shape them to my best! LOL.. 


Overall, taste quite like sweet dough with soft glutinous rice in the middle. Goes well with a cup of coffee! Now I am going on a hunt to find where in SG sells this and going to try how far does mine taste from the real thing! 

Sidenote, I freeze some and plan to see if they will fry well after freezing. I can make them and keep for days when i crave for it! 

Kap zhong (recipe from Youtuber-Poh Leng Tan)
Dough:
125g Bread Flour
175g Plain Flour
65g sugar
1.5tsp Yeast
1/2tsp salt
175ml water
1/2tsp Baking Soda
1big spoon Oil

Glutinous Rice (I only made 1/2 of her reipce)
100g Glutinous rice, soaked 4hrs
30g sugar
1/2tsp salt

1) Prepare glutinous rice, drained and stir in sugr and salt. Add water to cover top of rice and steam for 30mins.
2) Add all dry ingredients in breadmaker. Add in water and knead for 5mins.
3) Add in oil and knead another 25mins. Rest for 30mins
4) Roll cooled glutinous into a long strip and set aside
5) Roll out dough into long strip. Place glutinous rice in and roll up like swissroll.
6) Cut into portion and flatten then coat some sesame seeds
7) Deepfried til golden brown. Serve warm or cooled. 

Tuesday, March 5, 2013

Mini Dough Fritters


I always have a problem when I cook Bak Kut Teh for dinner, I don't have a source of Dough Fritter near me cos I loves to dip them in the soup. Now my kids, seeing me eat like this, both of them also enjoys eating them in the soup too.. As the saying goes, monkey see monkey do!! (But I am not monkey hor)

I was afraid of failure cos it seems like so difficult and I don't have ammonia as per the recipe calls for. So I jus take a gamble n tried it. Yeah, I succeed. It taste like those selling outside and less saltish and it is fried with 'fresh' oil... Yummy. So now I don't have to worry when I wanna cook Bak Kut Teh!! 


Dough Fritters (adapted from Angie's Recipe)
**i halve the recipe for 8 mini fritters, about 10cm long
125g Plain Flour
1g Baking Soda
1g Baking Powder
2g Salt
78ml Lukewarm Water

1) Mix all ingredients in the bowl, except for water. 
2) Drizzle in water slowly as u mix, into a non-sticky and smooth dough. Rest for 1hour
3) Knead again and rest for 45mins
4) Heat up oil and cut dough into 5-7cm long, 2cm wide. Stack 2 pc together and use a skewer to press a line in the center on both sides.
**i sugg doing them up b4 heating oil as it fries up very fast
5) Deep fried til golden brown

Thursday, October 4, 2012

Snacks for little children


Did I mention that my kids loved egg tarts a lot? They will usually eat at least 2 each on top of whatever dim sum that we ordered. So this Children's Day, I decided to make the super mini egg tarts with the moulds that I have gotten a friend from msia to buy for me.
They are about 'pop in the mouth' size for adult so maybe about 2-3 mouthful for little children. And I believe 1 egg tart each is enough to make the teacher busy.. And I have also prepared a few bigger size ones, about those mini egg tarts you see from some Dim Sum place, for the teachers. I hope they will like it.

the 'naked' tarts
after sauna


the side view after i bite
I replaced the plain flour with cake flour cos I have ran out of plain flour at home. Initially didn't want to make them cos I am worried of the end products. But after some persuasion from a dear friend, I decided to take the plunge with my fingers crossed. And Thank God, it is really yummy.
Egg Tart Pastry (adapted from DeQueen) **Makes 20 super mini & 16 mini**
125g Butter
230g Plain Flour (replaced with Cake Flour)
60g Icing Sugar (reduced to 55g)
1 egg yolk
1/2 egg white

1) Rub butter into flour until it resembles breadcrumbs
2) Add icing sugar
3) add in egg yolks and white, mix to a pliable dough
4) Refrigerate for 20mins before using

Egg Tart Custard (reference to prev post) **i halve the recipe**
65g Milk
1 Egg
1/2 Egg White
30g Sugar
33g Hot Water
1tsp Vanilla
Pinch of salt

1) Stir sugar into hot water til dissolve
2) Mix in milk, vanilla, eggs, salt and mix well
3) Strain the mixture and leave aside

Assembly the tarts and custard:
1) Weigh 15g dough for super mini tart mould, 20g for mini tart mould
2) Roll out and press into tart mould
3) Pour egg custard 3/4 full, bake at 200deg for 20-25min or until custard bubble up

Tuesday, September 11, 2012

Fan Choy (Chicken)

Saw some dim sum photos and happen to had some Fan Choy from Ho Kee Pau got me inspired to make my own. Of cos, I dont aim to attain the same standard but then somewhere there would get me excited.
I substitute chicken breast for the pork to make char siew and omit the egg. I first marinate the char siew (which I will share the recipe later) overnight. Grill them in the oven the next day. Also prepare 1 cup of cooked rice the night before and keep in the fridge for later to use.
It is somewhat delicious, considering that it is made with lots of LOVE frm home, but not to the standard of Ho Kee Pau. Still worth a try though.
Chicken Char Siew
3 Strips of Chicken Breast
2 Tbsp Char Siew Sauce
2 Tbsp Oyster
1 Tbsp Dark Soy
1 Tbsp Sesame Oil
Marinate with above seasoning overnight
Bake them in the oven at 180-200deg wrapped in foil for 15-20mins
Cool and keep aside for later use. (Do not discard the juice from baking the charsiew)
Fan Choy
1 Cup of Cooked Rice
2 Chinese Sausage
Juice from baking char siew
1 Tbsp Char Siew Sauce
2Tbsp Hot Water
Mix the liquid together, add hot water gradually to taste. Leave aside
Put rice and mix with the sauce.
Arrange the ingredients at the bottom of aluminum foil
Scoop rice on top, adding a little gravy so that rice will be slightly moist
Steam for 5-10mins after water boils. Serve warm


Monday, June 25, 2012

Egg Tarts (Pastry from scratch VS BC Premix)

Attempt to make some egg tarts over the weekend for our mahjong session as plan to have a try but haven got down to work. Chanced upon this recipe that says it is soft and melt-in-the-mouth, I decided to give it a try. I made them into small tarts, halve the recipe but then the filling was more than enuf for another 12 small tarts so I open up my Betty Crocker Pie Mix and see what's the impact it wil have on the Egg Tarts.
End verdict, i still prefer the made from scratch tartlets compared to the premix pie mix, kinda saltish for my liking. But the filling, it's gonna be a recipe that I am going to keep for good. It is yummy and taste like those from outside. MMMmmmm...
Flaky Crust Egg Tarts (adapted from Bisousatoi)
**halve recipe**
Ingredients
Pastry
125g plain flour
1 tbsp castor sugar
1/2 egg yolk
75g cold butter, cubed

Filling
75g castor sugar
75ml hot water
125ml milk
Pinch of salt
1/2 tsp vanilla essence
1 1/2 large eggs
1/2 egg white (From the same egg where the yolk was used in the crust)


Method
Cream the butter with the egg yolk and sugar.
Add in flour. Mix well. (If the dough is sticky for you , well maybe your yolks are larger than mine, add in extra flour by the teaspoon until it no longer feels sticky, but got a slight flour feel to it, but not too much though, as it will toughen the crust. the borderline of stickiness and dry feel is very thin.. so, add extra flour with caution)
Roll out pastry in between two sheets of plastic into thickness of about 4mm. Stamp out 9–10cm circles of pastry with a pastry cutter.
Lightly press the pastry circles into foil tart cases or tart tins.
Refrigerate the lined foil cases for 2 hours or u can leave them overnight
Melt the sugar in hot water, add milk, salt, vanilla essence. Beat all the eggs lightly and mix in all together.
Sieve egg mixture and pour into the cold tart crust.
Bake at 175C for 25 minutes