Showing posts with label Sweets. Show all posts

Thursday, July 4, 2024

Vanilla Madelines (Thermomix)

Today used cookidoo recipe to bake these lovely vanilla madelines for school. Whole house smells so nice while they are baking in the oven.

Back and resume routine, trying hard to go with my initial idea of reducing processed food as much as I can in their daily meals, and if possible for school snack/recess boxes.
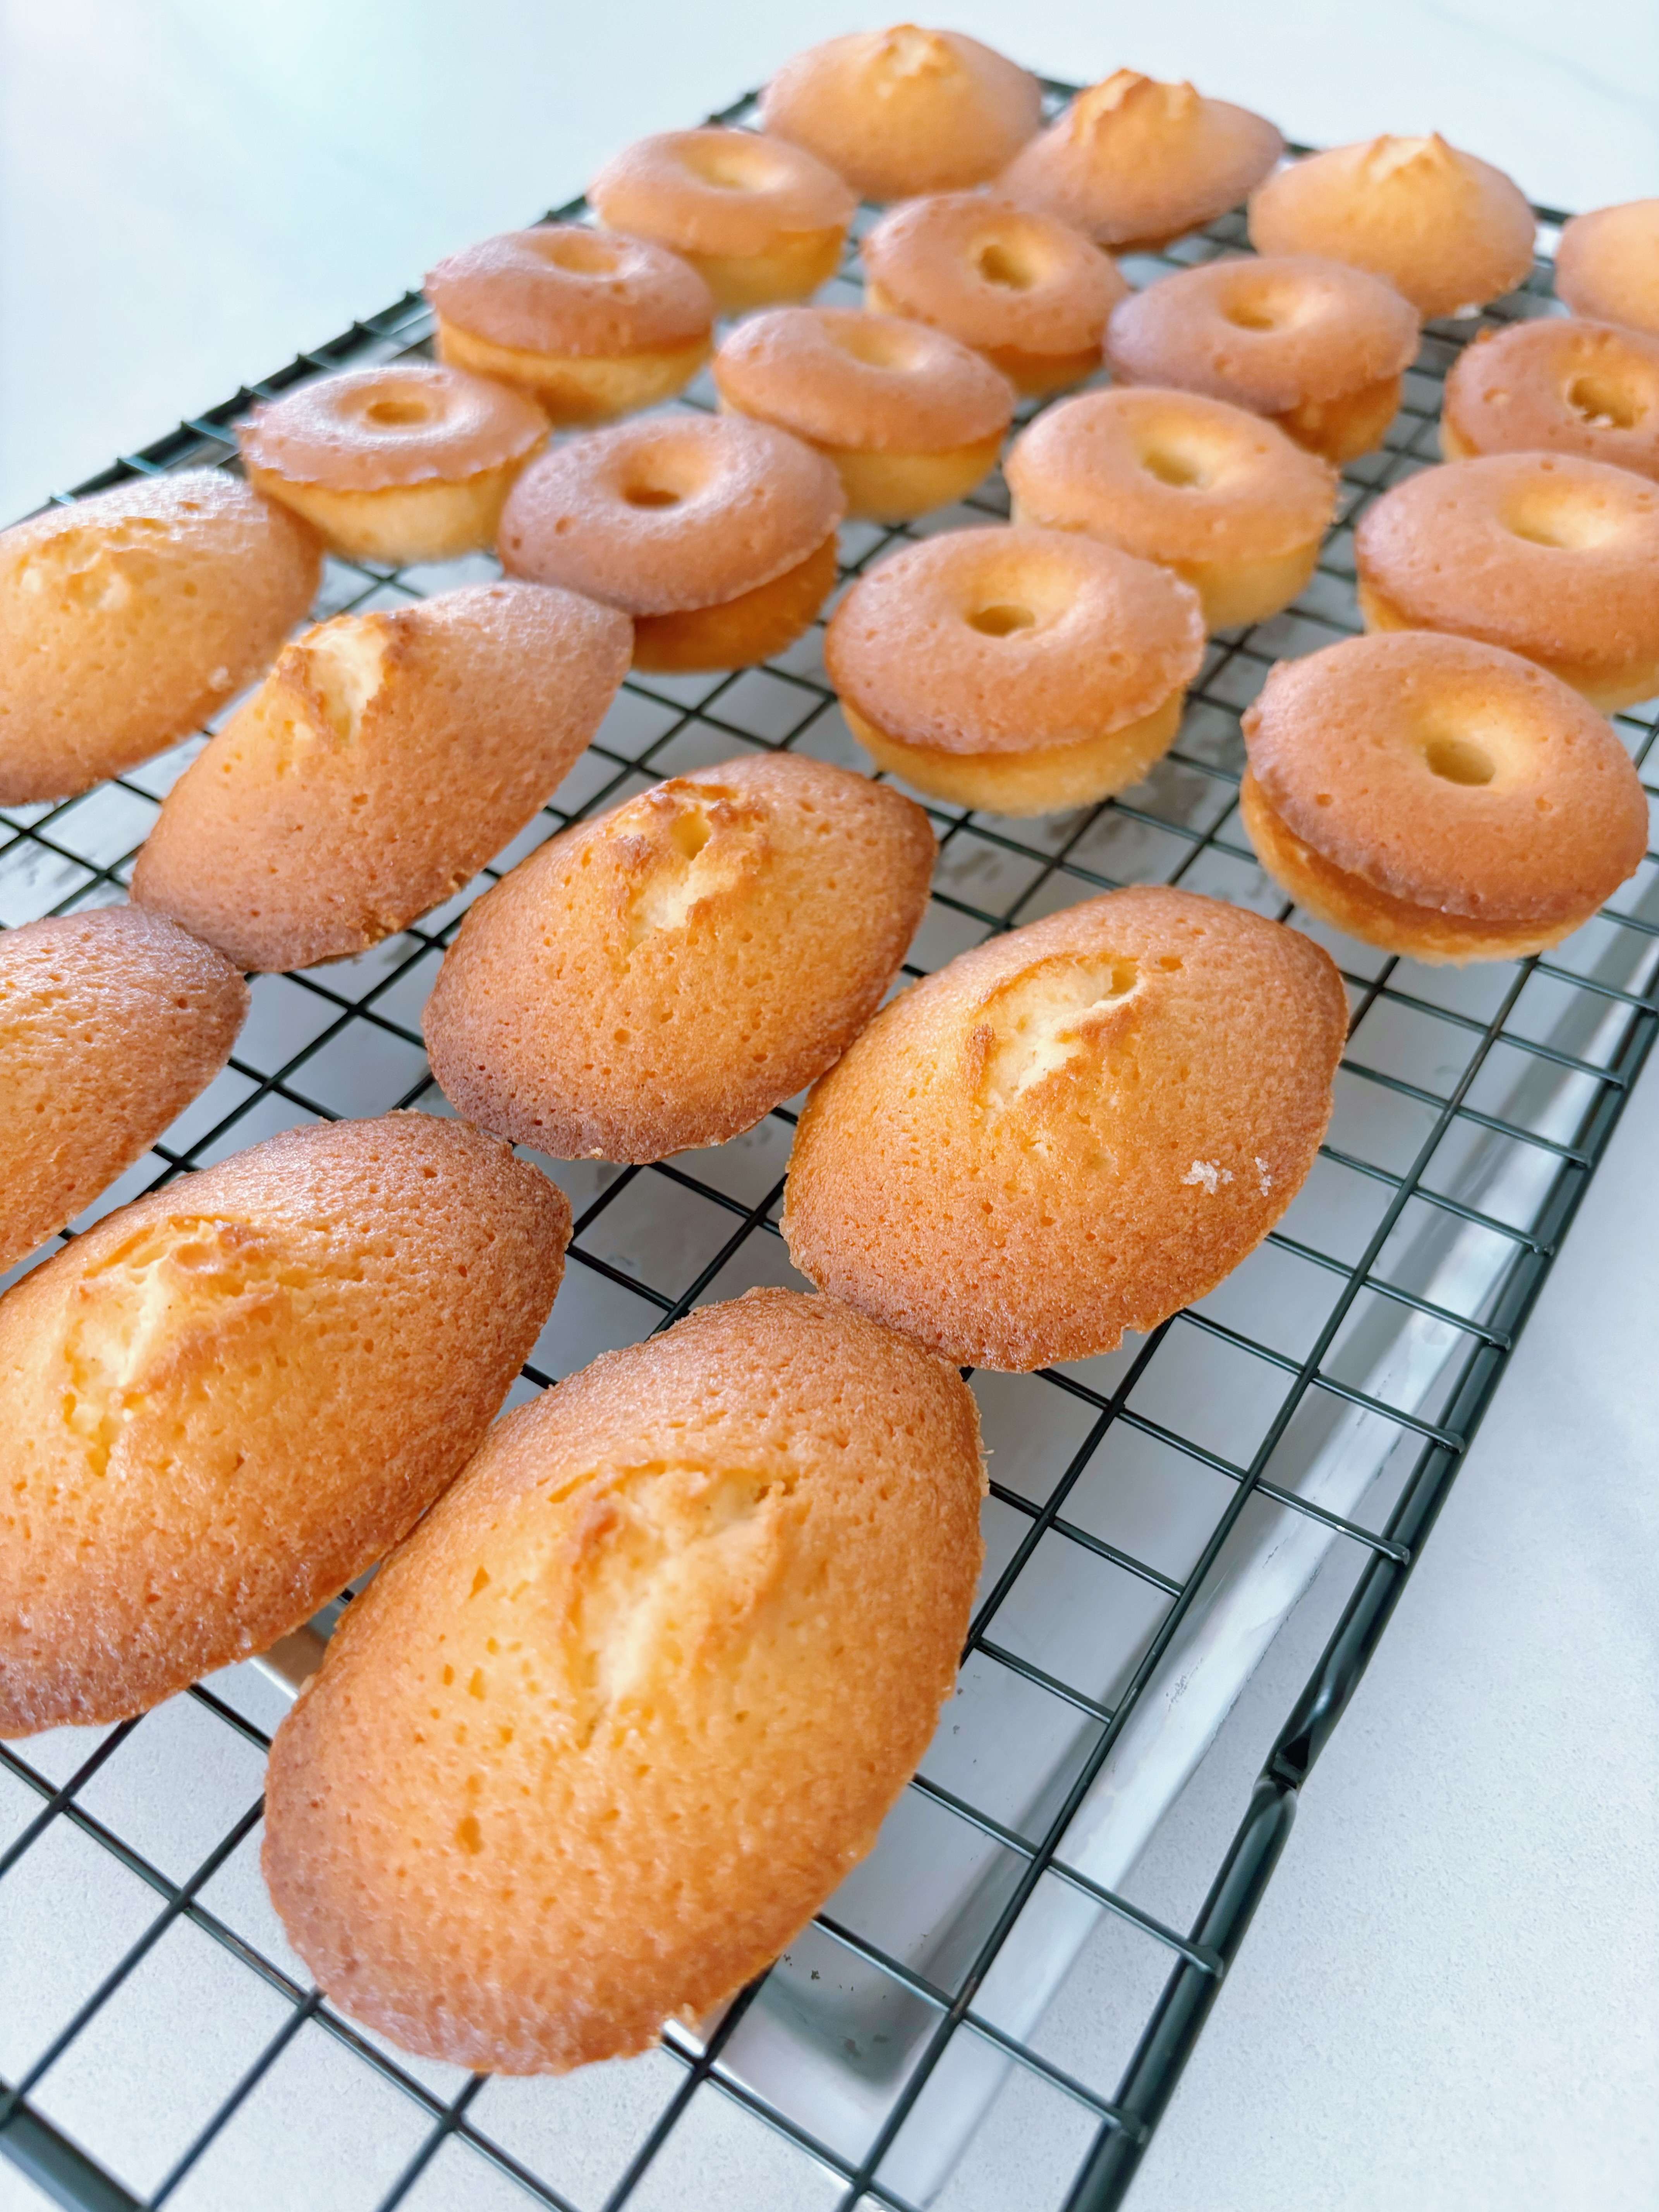

I put balance batter into my minu donut pan as I wan to bake them all at a go. Didnt had time to oiled the pan, luckily all came out easily. 


They are buttery and soft. Smells great and goes well with my cup of coffee. Its so addictive that you cant stop at 1, even hub is complaining. ❤️ Recipe link is here

Vanilla Madelines (From cookidoo)
3.5oz butter, cube
2 eggs
3.5oz sugar (i reduced to 2oz)
3.5oz plain flour
1/2 tsp baking powder
1/4 tsp vanilla paste
pinch of salf

1. Melt butter, 3mins 250F speed 1
Remove n set aside. Use it to oil pan and fridge til needed
2. Put in butterfly whisk. Add sugar, eggs, vanilla, 1min speed 3.5
3. Add flour, baking powder, salt, 5sec speed 5
4. Add in melted butter, 10 sec speed 3.5
Repeat 1more time
5. Pour batter into bowl n cling wrap. Chill for 1hr
6. Put 1 sponnful batter into madeline pan. Baked for 10-12mins 180deg

Wednesday, December 8, 2021

Sponge Finger (Dessert Base)


In life imagination and expectations always turns out different. And some people maybe more artistic, or creative or something that is your own strength.


I was never the artistic person, a bit of creative maybe but I always tried my best. LoL! And remember never to be dishearted when things dont go your way, somehow some stuff are never meant to be! The same goes for friendship, relationship and even kinship. Toxic people just let go, mingle less if you cant. Year is coming to an end, lets set off to a more positive vibes year in 2022! Ok, getting a bit heavy now! 😅


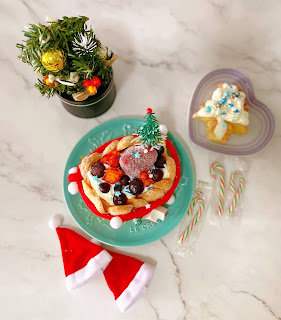
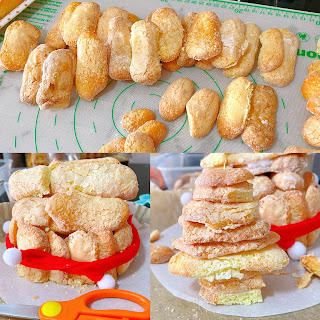
Today I tried making some sponge fingers from scratch as I wan to build my own christmas house. Turns out I didnt have the flair for it so I decided to use it as a base for my dessert! 


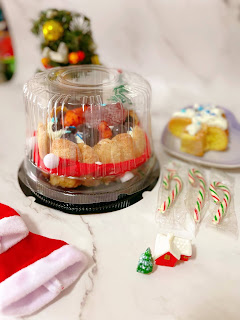
Since I have some whipped cream and frozen fruits and ta-daaa~~~ Our after dinner dessert is ready! Now chilling in the fridge for us to eat later on! 😋😋 After putting them in a box, looks like a snowglobe to me! Actually its a great gift to make for your friends too!


I tried 2 ways of baking the sponge and as it is too light, the rack on top of paper works better for me! And freshly baked sponge fingers is not so dry as compared to storebought and taste so much better! So here today, sharing my sponge fingers recipe along with my failed house and tree pics! 🙊

Sponge Finger (recipe adapted from Cookidoo)
4 whites
4 yolks
80g icing sugar
Pinch of salt
120g plain flour

1) Sift flour and set aside
2) Whip whites and salt til soft peaks
3) Continue whipping whites and add in icing sugar gradually, til glossy stiff peaks
4) Fold in flour gently and lightly, without overmixing
5) Pipe onto baking paper your desired sizes
5) Sprinkle icing sugar on the piped fingers and rest 5mins
6) Preheat oven to 180deg
7) Bake fingers for 10-12mins x 180deg or til top is nicely browned

#priscillacooksnov

Tuesday, December 7, 2021

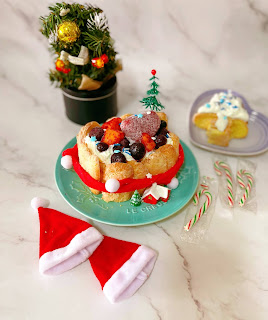
Sea Salt Chocolate Tart w/Christmas Choux


 Actually wanna make some sea salt chocolate tart and last nite during a meeting, we were talking about christmas tree made up of choux! 


Then it somehow brought me thinking to combine them
both and also have a chance to try out fixing a christmas tree with my choux! 


I would prefer using chocolate callets as the hershey chips cant really set well. It is more like flowy chocolate filling when u bite it! Tastewise, it is good cos I am using the sea salt chips! So tasty with the bits of sea salt sprinkle on top of the tarts! 


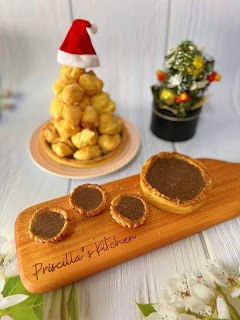
I lightly assemble the choux on my 6” tart, filled with the chocolate filling. Carefully adding some toothpicks for those choux above to secure them! Wearing a santa hat for my tree! Ta-daaa~~ So cute!!!

Sea Salt Chocolate Filling
125ml Whipping cream
110g Hershey sea salt choc chip (works better with choc callet)
Sea salt for garnish

Choux recipe is here
Tart recipe is here

1) Put water in pot and put in steam rack. Saute mode Hi
2) Place pot with whipping cream on rack and wait for water to bring to boil
3) Add in chocolate chips, close lid and off power. Wait 3-5mins
4) Open and stir them well. Used as desired. 

Friday, November 26, 2021

Choux Pastries Christmas Theme


Wanna make something christmassy and decided to make some meringue christmas tree as topper for my choux. Been a while I had some choux and since my thermomix can help me with it, so why not?


It very easy to fix up the choux pastry with my thermomix and I am so glad that my choux puff up nicely in my ninjafoodi. 🤞🏻🤞🏻 Well done to my 🥷


So nicely puff up right!!! Love it. I rem doing stove top training my arm muscles and it is not 100% success rate! Woohoooo! So excited!


If you are lazy, whipped cream and sprinkles does the job too! I tried piping a christmas hat, christmas tree and a round wreath. Doesnt seems that alike but the whole deco makes the choux so pretty! 


All packed and ready to share fats with my neighbours! A nice gifts for your frens too.!!


Choux pastry (recipe from cookidoo)
*Pipe into bigger base and cut into halves

  • 150 g water 
  • 80 g butter, unsalted, cut in pieces
  • 1 pinch salt 
  • 2 tsp sugar (10 g)
  • 120 g plain flour 
  • 3 medium eggs

  • Place water, butter, salt and sugar in mixing bowl and bring to a boil.
  • Add flour and mix into a thick consistency.  Remove and set aside to cool for 10 minutes.
  • Preheat oven to 200°C. Line a baking tray with baking paper and set aside.
  • Once mixture is cooled, add eggs one at a time and ensure it it nicely mixed in
  • Transfer pastry mixture to a piping bag and pipe into balls leaving 5 cm space between each. 
  • Bake for 15 minutes (180 deg) or until golden brown. 
  • Once all batches are done, i put back to the hot ninjafoodi to cool and dry while leaving the lid ajar
  • Remove tray from oven and allow choux pastries to cool completely before serving or filling as desired
**note: I am using ninjafoodi similar to airfryer so i cut baking time and temp
**For oven pls bake at 200deg x20-25mins and let it cool with door ajar for 10mins
*omit vanilla and uses pandan gel instead
  • 100 g icing sugar 
  • 2 egg whites 
  • 1 tsp lemon juice 
  • 1 pinch salt 
  • 1 tsp pandan gel
  • pure icing sugar, for dusting

  • Double boil egg whites, lemon juice and salt into mixing bowl and whip til soft peaks
  • Then remove and continue to whip while lowly adding sugar 
  • Add pandan gel and mix until colour is mixed through evenly. 
  • Transfer into a piping bag fitted with a star nozzle (10 mm).
  • To assemble, cut cooled choux puffs into halves horizontally. Pipe Swiss meringue generously over bases, top with a meringue christmas tree and dust with icing sugar before serving immediately.

Thursday, November 25, 2021

Confetti Meringue


Made some meringues for the kids to snack on! And i wanna share a hack!! 


Rem hw ppl were saying baking paper keep flying? Light food tt u bake will fly? When my first batch of meringue flew, suddenly i realised i can use the metal rack to sit on my baking paper! YAY! no more flying! 


Jus leave it in my ninjafoodi to slowly cool down after baking. Prop over a cooling rack so it kept ajar. Kids had it with some fruits for snack! Sugar rush!

Confetti Meringue (recipe from cookidoo)
3 whites
114g sugar
1-2drops pandan extract

1. Whip whites til bubbles form
2. Continue whipping whites and add sugar bit by bit until its finished
3. Add a few drops of pandan extract and mix another 30seconds.
4. Pipe on baking paper, sprinkle with some colourful sprinkles and bake at 120deg x 60-75mins, depending on size of meringue
5. Leave it to cool with door ajar once done baking

**All steps remain same except that I used pandan extract instead of colourings

Saturday, April 17, 2021

Chocolate Chips Scones


Out for the morning til late afternoon and since dinner is gonna be an easy meal so I took some time off to make some scones for breakfast next day ❤️ 

Saw this recipe that a fren did and posted and it looks really good. Decided to make some to try. And since I wan to offer to the kids, I decided not to make earl grey but to add in some chocolate chips. 😋 All-time fav is chocolate for me! 


Texture is crunchy on the outside yet fluffy on the inside. Its not overly sweet and I can taste the bitterness of my dark choc chips! Love it!! 


Easily mix up the scones dough in a short 15mins or less. Chill for 30mins before cutting them up and bake. Great for impromptu tea time snack too! Do try it and come up with your own favourite flavours. 

 
Chocolate chips scones (adapted from korean scone boy)
200g Cake flour
30g Sugar
4g Baking powder
2g Salt
70g Butter 
60g Milk (added 1tsp homemade vanilla extract)

Chocolate chips, optional

1) Sieve flour and add in dry ingredients and give it a stir
2) Rub in butter til it resemblences breadcrumbs. 
3) Add in milk and mix it til it forms a dough. Cut into halve, stack on top and press down and repeat 2-3 more times. Chill for 30mins
4) Roll out chilled dough and cut into desired shapes. Brush with milk. Bake at 180deg x 20mins.
Serve with your favourite coffee, jam and butter ❤️ 

Wednesday, May 27, 2020

Brown sugar boba II


Saw this new milk from Magnolia and finally got my hands on it. Decided to make some brown sugar boba to try it with the milk! 


I didnt roll them as feeling lazy, jus cut into small cubes and coat with tapioca flour. Shake off excess flour before boiling them. Then strain and put them in iced water. Quickly bring to boil brown sugar and water for the syrup and adding the boba back in to simmer til it turns thick.


Set aside to cool before using them. It taste soft, chewy with the hint of brown sugar fragrance! Yums! Goes so well with the brown sugar sea salt milk too!! Do give it a try!!


Brown sugar boba (adapted from Oven Fresh by Christine)
50g brown sugar
70ml water
100g tapioca flour

brown sugar syrup: 360ml water + 100g brown sugar

1) Bring brown sugar and water to boil
2) Add in 2-3tbsp of tapioca flour first and stir them til mixture is thick
3) Off fire and add in remaining flour and mix into a dough
4) Pour ontop baking sheet and slowly knead them together (be careful, its hot)
5) Roll out into a flat sheet and cut into strips and desired size and roll into balls (i didnt roll, cut into small cubes) Toss them in tapioca flour
6) Bring to boil a pot of water and shake off excess flour before adding in the boba
7) Boil til it changes colour, approx 10-15mins
8) Strain n put in ice water
9) Mix brown sugar syrup ingredients in pot and bring to boil, add in boba
10) Bring to boil then pour in boba, med heat and stir to prevent sticking
11) Simmer til it becomes thick. Cool before using

Friday, January 31, 2020

Love Letters


Been waiting for my cake machine to attempt these!! Love eating both versions of love letters - Rolled up or Folded!! My fav is Julie’s chocolate love letters!! 

Finally my machine arrives and since we are reducing the frequencies of bringing the kids out, esp
the 3yo who cant keep his hands to himself, happily washed up all the plates I have gotten!! Total of 8 or 9 kinds 🙊🙊


Wasnt that hot to handle from the machine if you are folding them but quite hot if u want to roll them up. And i really cant roll then well and it became a thick ‘tree trunk’! lol

The recipe is simple. I weigh all in a measuring cup n whisk it well. Then use a big spoon to add 1 spoonful of the batter at a time. Size was just nice!!!


I tried doing 1 fold for the kids to eat. Way easier to fold it flat n lesser crumbs to handle when they bite it, esp my 3Yo!! Going to try more different flavours! Stay tune! ❤️❤️

Love letters (adapted from Lisa Lemony Kitchen)
halve the recipe, makes about 30
62.5g Rice flour
1tbsp Tapioca flour
75g Icing sugar
1/2tsp Salt
120g Eggs
125g Coconut milk

1) Mix n whisk all ingredients in a mixing bowl
2) Add 1 spoonful per batch n monitor the ‘cooking time’ 
(approx 30secs++ for initial few pcs n slowly it gets faster to cook as it is more heated up)
3) Quickly fold or roll as you desired. Keep in airtight once totally cools down.

Monday, February 18, 2019

Chocolate Chip Cream Cheese Cake


Been sitting on my butt to bake as I really wan to bake something. But so busy with my learning materials and the kids’ schoolwork and all, and to top it off with an active 3yo-to-be, TIME is never enough! 

Today is my neighbour’s birthday! This call for a good reason! She always shower me with all her cooking, mee soto, curry, ayam masak and many more! Me always shower her ‘fats’ whenever I bake! But I haven been baking often lately. 🙊🙊

I googled and chances upon this recipe with whatever ingredients I have at home. So decided to try this interesting recipe today! Loved the cookie crust and the combination of the creamcheese tho a tad sweet, it is crunchy, chewy and soft. Yums! Perhaps with the addition of the chocolate chips, I will reduce the sugar in the creamcheese batter the next round. Reduce a bit of chocolates the next round and add a bit more sugar in the cookie dough and add some cinnamon? 🤔🤔


Can you see the layers?? I love it! Hub loves it so much and asked me why so little! Lol!! Ooppss, I baked a small 4” cake tin for own consumption cos we rarely have sweet tooth! But i think he likes chewy cookies so he totally fall in ❤️ with this one!! 


Have one too, my friends!! I will share the recipe source below! Serve it on its own, warm with a scoop of ice cream or have it chill! 

Chocolatw Chip Cream Cheese Cake (recipe adapted from LoveFromTheOven)
Bowl 1:
140g Plain flour
115g Sugar
1/2tsp Baking Powder
1/2tsp Baking Soda
1/4tsp Salt
1 Egg
5Tbsp Melted butter

Bowl 2:
150g Cream cheese
1 Egg
1tsp Vanilla paste
200g Icing Sugar

Toppings: Chocolate chips or any of your preference.

1) Put all dry ingredients in a bowl, sift. Add in melted butter and egg. Mix to form a soft dough.
2) Line baking tin and grease lightly. Press the dough onto the bottom of the tin. 
3) Beat creamcheese, egg, sugar and vanilla til smooth. 
4) Arrange some chocolate chunks on top of the cookie dough base. 
5) Pour the creamcheese batter on top and smooth it. Sprinkle chocolate chips on top.
6) Bake at 180deg for 30-40mins or til top is browned nicely. Serve warm or chill

Monday, December 24, 2018

Mrs NgSK Butter Cake: Revisited


Using Golden churn this round, mild buttery taste. Sweetness just nice with the reduced amount! Love ❤️❤️❤️ Bringing them to family gathering to share... 


Couldnt resist and took a taste test.. Mmmmmmm 😋😋


Mrs NgSK Butter Cake
(Recipe as per previous post, with updated modifications)
Egg whites :
4 Whites
50g Sugar

Cake Batter:
230g Butter, room temp
80g Sugar
4 Yolks
1Tsp Vanilla Extract/Paste
60ml Milk
200g Self-raising Flour

1) Beat whites til stiff peak, set aside
2) Beat butter and sugar til light and fluffy
3) Add yolks 1 by 1 and mix well after each addition. Add vanilla paste.
4) Add 1/3 Flour, mix well. Add milk in 2 addition, alternate with flour. Mixing well after each addition.
5) Add in half whites and mix til no streaks. Then pour remaining whites and mix well.
6) **I took 2Tbsp of batter and added 1Tbsp cocoa powder and mix** Pour remaining batter into baking pan and level.
7) Scoop cocoa batter onto top of cake batter and make swirls. Bake for 45mins at 170deg or til skwer comes out clean and top is browned!

Tuesday, December 4, 2018

Muffins - Choc chips & Mixed berries oat


Been thinking what to bake with the kids today as my #3 wasnt well. Slight fever and flu. So was kinda last min to do something with them today as #3 seems better slightly. So I look around for something simple and I have ingredients for. 

Bookmarked this Crazy Muffin recipes from Bigger Bolder Baking and its my to-do with the kids. As it is so versatile and uses vegetable oil, I dont have to worry about not stocking up on butter at home. Like as and when if I dont have breakfast for the next day, this seems like the perfect recipes to go to.. I do have other muffin recipes in my blog that I tried before but i like this better as it is moist and fragrant. 


I made my own Buttermilk too, with reference to the above baker. Adding lemon juice and sit rhe milk for 30min before using. It will curdle so just shake well before using! I think its the use of the baking soda, buttermilk combo that makes it so soft n fluffy. Just a mixing cup and a bowl, we are set to go! Actually if its not for the kids baking, I would have weigh everything inside the bowl and cup. 😂😂

Both kids enjoy rhe baking now as they do them from scratch. So today I let my gal weigh out 120ml of buttermilk as i purposely made it in the milk carton and sit it inside while I make my #3 go for his nap! It took us like 30mins to mix up and scoop the batter to cupcake cups. I halve the recipe so we can bake a smaller portion and make them again, into other variations! 


Today we made Chocolate chips and Mixed berries Oat. Botb smell lovely from baking and it taste yummy! Can u imagine the kids will like the mixed berries oat flavour?? 😂😂 Serve it with fruits for tea today! 😋

Crazy Muffins, recipe halve to make 8 small sized muffins (adapted from Bigger Bolder Baking)
Dry ingredients:
177g Plain Flour
90g Sugar
1tsp Baking Powder
1/4tsp Baking Soda
Pinch of salt

Wet ingredients:
1 Egg
120ml Buttermilk
60ml Vegetable oil
1tsp Vanilla Paste

Some chocolate chips, oat, frozen mixed berries

1) Whisk dry ingredients in mixing bowl to mix them up
2) Whisk wet ingredients til well mixed and pour into dry mixture
3) Using a spatula, mix until no dry streaks of flour can be seen. Take note not to overmix
4) Divide into 2 portion (can be more depending on how many variations you making). Add in toppings as desired.
5) Bake at 180deg for 20-25mins or til skewers inserted comes out clean. 


Friday, November 30, 2018

Meringue Pop


Kids has been waiting for me to make this with them, especially after showing them numerous videos, pictures of ideas what we can do with it! Mummy very bad as I purposely waited and waited!


So I made them prep the meringue, helped them out a bit. We made 3 colours, white, green & purple.
They get to drop the colourings and mixed them up. Show them how to pipe and let them have a go! 

Little boy isnt that ‘steady’ with holding and squeeze the meringue for his christmas tree. I hold and helped him with the first, then let him do it. He was worried when the shape was out, so I told him I will correct after he is done. Just go ahead and do and try it! 

Then my big gal took her turn. She wants to make unicorn pop. And was asking me 2D, 3D and I told her dont stress me. Jus pipe what you want cos I dont know what 2D or 3D you want. 😂😂😂 So there she goes and then the tray went chaos. Seriously I dont know what the 2 of them were ‘drawing’. Anyway its for them to have fun, so lets have it! 


Baking took 2hrs, need to cool before using the edible markers to draw. YES, we purposely buy the markers for this project! 😂😂 And they have been checking and CHECKING if its done and ready to draw! 🤦🏻‍♀️🤦🏻‍♀️ Finally dried enough frm baking, cooled enough and they started drawing theirs. 

Fun project for the holiday. Try them at home! 

Meringue cookies pop (adapted with slight modifications from Kokoma’s)
60g Whites
60g Caster Sugar
1tsp Vanilla Paste (optional, i added as i worried if there will be egg taste)

Colourings as desired

1) Whip egg whites til bubbles, add sugar and continue to whip til shiny and glossy.
2) Add vanilla paste and whip til mix in well.
3) Portion and add colourings as desired.
4) Pipe and bake at 70-100deg for 2hrs or til dry to touch. Cool before deco with chocolate or edible markers. 

Thursday, November 29, 2018

3-Ingredients Homemade Ice Cream


Saw this simple recipe that can create many different flavours of ice cream from this ice cream base! So simple and actually I have seen this recipe many times but didnt know that I can use it as a base! And after telling the kids, they have been bugging me and asking me to get the ingredients, as well as the disposable paper tubs for it!

So off we went to SKP, I got the smallest size available as it is simple to jus take 1 small portion out and throw away once you are done. And also they can make many ‘flavours’ from the base. Its not very expensive. Cost $4.40 for the cups and another $1 for the lids. Its in a pack of 50s so it calls for many ice cream making session!

Simple toppings were requested for. So I put in a few small jars for easy access to top the ice cream with. And I got a small pack of organic mixed berries at $7.95 and use it for the Mixed berries flavour. Jus squash them when slightly thaw and you get ur fruit puree! M&Ms, Colourful sprinkles, Mixed fruits puree, Marshmallow, Chocolate bits (leftover from mochi making), Oreo, Cookies & Belvita! 

So I whipped up my base. Supposed to be 2-Ingredients as you can add flavours to them individually after whipping up the base but I decided to make it Vanilla base so I added 1 more ingredients and call it 3-Ingredients! 😂😂 Whipping cream, Vanilla Paste and Condensed milk. And I reduce the ingredients accordingly so I wont have leftover from the condensed milk too!


Kids having so much fun. Cutting up marshmallows! Each got 3 cup to mix in and so happily adding drops of colourings to ‘colour’ their vanilla ice cream, toppings as they like and freezing them for dessert when it’s done! I made 2 cups with mixed berries and top with crushed belvita!


We tried them after 4hrs exactly. Too bad still a bit soft. But the texture looks promising and taste is yummy!! I think we need waffle and ice cream tml!! ❤️❤️


3-Ingredients Ice Cream (adapted from Bigger Bolder Baking)
340ml whipping cream (I used Redman All Purpose Whipping cream)
300ml Condensed Milk (Dutch lady 35% less fat), keep it cold before using
1/2Tbsp Vanilla Paste (Redman)

1) Whip cream to stiff peaks in clean mixing bowl
2) Add vanilla paste and mix to combine
3) Add in condensed milk and whip top thick n fluffy. 
4) Add accordingly the toppings you wan and freeze them for 4hrs or overnight before serving. Have fun! 

Tuesday, November 27, 2018

Mochi with Chocolate filling


This week we did Mochi. Lots of scolding cos mummy a bit OCD as they goes directly into our mouth after moulding them. 😂😂 Mainly the boy who got them most as he doesnt have some ‘flair’ in wrapping them and thought the bigger the chocolate filling the better for him to eat! 🙊🙊 Ended up with messy and unable to ‘close’ mochi and chocolate oozing all over. 🤦🏻‍♀️🤦🏻‍♀️

Nonetheless, they had some tries to wrap a couple, not much but like 3-4 of them to try out and have some experience of wrapping them. Most were unable to close up and seal. We only managed to wrap like 8-9 successful ones. We taste test after we done and left with 5 to keep for tea. 😬😬

I think we wrap a bit too thick, chocolate were huge. Dough could have been softer and chewier. Will definitely try them again. And both opt for their favourite colour - Green & Purple mochi.


Little boy helped to mix the dough before microwaving them. Was a bit tough to stir them well so i took over. But at least they know what it is all about to making a mochi. 


Happiest moment, having them over tea break with fruits on the sides! Helper love the taste of the chewy mochi and generous chocolate filling too! My boy pop the whole thing in his mouth and says the mochi exploded! Yums! My gal is more ‘fussy’ about her food and says the chocolate is yummy and delicious but could have do better with a thinner dough and softer in texture. 😂


Mochi, makes approx 8-9 balls (Mochi from Cookat)
100g Glutinous Rice Flour
50g Sugar
1tsp Salt
100ml hot water
Drops of colouring (optional) 

Chocolate Filling (from The Squishy Monster)
120ml  Whipping cream
115g Baking chocolate

1) Melt baking chocolate in warm whipping cream. Stir well to combine and put in freezer to chill for at least 2hrs. Cut into desired sizes and leave in fridge til needed.
2) Mix flour, sugar, salt in bowl. Add hot water and colourings and stir well. Microwave 1mins covered with cling wrap, remove and stir. Microwave again for 20-30seconds.
3) Remove dough and put on dusted baking paper. Roll and cut into appropriate sizes. Mould like a wanton wrapper and put chocolate cubes and pinch edges to seal.